Risotto with Patty Pan Squash

It’s a bird…It’s a plane…It’s a patty pan! For those who don’t know, it’s a summer squash that has an eye catching disc-like shape, kind of like a flying saucer. Well, it certainly caught my eye. I mean, I’ve seen it before but never dared to buy it. It’s pretty and all but who knows what it’s like on the inside.

Mushroom and corn risotto served in a scallop shaped patty pan.

Mushroom and corn risotto served in a scallop shaped patty pan.

I am just resigned to own this vegetable since it turned up in my AMAP ( CSA ) basket this week so I started to procure recipes from my fellow Amapien members. There’s a photo of my AMAP pick-up spot here. It seems like most people like to make gratins out of things that are tasteless. I was beginning to wonder if this was what my scallop shaped squash had to offer me.

I was adamant on keeping its shell as a decorative serving piece so all I had to do was stuff it, right? I love eating rice with most anything so I decided on making a risotto since it’s creamy in its own right and not in a gratin-like way. It turned out to be a great combo. I kept the patty pan flesh cooking in its shell and simply scooped it out when cooked and left it inside. I then filled the shell up with the risotto and stirred it around to mix it up.

Patty pan squash tastes like a yellow squash to me. It has a very moist flesh so it helps keep the risotto light and loose.

Bon appétit!

Risotto Patty Pan Squash- 1109-.jpg

Risotto Patty Pan Squash

INGREDIENTS//Serves 3-4

• 1 patty pan squash per person if you want to stuff it in its shell (patîsson in French)
• 1 medium onion, diced
• 1 cob corn, boiled and cut into kernels (1 tin of corn kernels will work too)
• 300 grams risotto rice
• 75 milliliters white wine
• 1 liter vegetable stock or your stock of preference
• 2-3 tablespoons of Parmesan cheese, grated.
• 1 tablespoon butter
• 200 grams crimini mushrooms, cleaned and chopped (champignon de Paris rose is what I get in France)
• 1 lemon, zest
• 3-4 sprigs of flat parsley, leaves only

PREPARATION

Slice the top of the pattypan off so that it forms a lid. Scoop out the seeds. Place the pattypan cut side up in a baking dish with a half inch of water and drizzle some olive oil over the pattypan.

Boil a liter of water to prepare your stock so that it is ready when you start to cook the risotto.

Place your mushrooms in a baking dish, drizzle some olive oil and add the parsley to the mix and toss.

Let the boiled corn cool down. Stand the ear up on a flat side (cut it flat if need be) and hold the top of the ear with your hand while sawing downwards to cut off the corn. This will give you about a half cup of corn kernels. Place it aside until ready for use.


INSTRUCTIONS

Pre-heat your oven to 180 degrees Celsius (350 Fahrenheit).

Place the pattypan in the oven and let it cook for 35-40 minutes.

I place my mushrooms in the oven at the same time. It cooks more or less about the same time.

Roast the pattypan and mushrooms in the oven while starting the risotto (cook time is about 30 min).

In a large pan, heat up some olive oil over medium heat and then add the onions. Cook them for about 10 minutes. Do not brown them!

Add the risotto rice and stir with a wooden spoon. Move it around until the rice turns translucent.

Add the white wine. It will sizzle and it should start to evaporate. Continuously stir the rice (patience is the key to making risotto). Apparently, stirring releases its starch which gives it the creamy factor.

As the rice starts to dry up, add a ladleful of simmering stock and continue to stir. When it starts to thicken up and get starchy, add another ladleful of stock and stir slowly.

Keep repeating this process until the rice is cooked. Most or all of the stock will have been used.

When it is cooked, add some lemon zest, stir in the butter and then the Parmesan cheese.

Take the roasted mushrooms and combine it with the risotto. Add the corn kernels and stir.

Place the cooked pattypan on a serving dish or individual plate.

Take a spoon and scoop the flesh around in the pattypan.

Fill the patty pan with the risotto while mixing in the flesh inside the patty pan.

Adjust with black pepper.

Garnish with a little sprig of parsley and serve.


NOTE

You’ll have to buy a patty pan for each person if you want to serve and stuff the risotto in it. Otherwise, you can just scoop out the flesh of the one patty pan and combine it with the risotto towards the end and serve the portions directly on your plates.

Whole Grain Rice Vermicelli Salad

Whole Wheat Rice Vermicelli Salad-0993.jpg

These summer lovin' noodles are perfect for packing: camp, picnics, road trips, and what have you.  There's not much cooking going on with this noodle salad so it's an easy meal that is filling, yet light and fresh.

The farmer's market has an abundance and variety of fresh vegetables to offer during this season so you don't have to stick to the vegetables I used for this salad.   Please your palate and make your mix of vegetables with a whole grain rice vermicelli noodle.

Whole Grain Rice Vermicelli Salad

INGREDIENTS//Serves 3-4

• 100 grams whole grain rice or regular vermicelli
• 2 zucchinis, raw and noodle length ("zoodles")
• 2 small colorful bell peppers, raw and diced
• 2 cloves garlic, grated
• 1 lime, juiced
• 3 tablespoons, homemade kaeshi sauce
•  1 avocado, cubed
•  A bunch of flat parsley, leaves
• 2 stalks scallion, chopped
• 2 bunch (usually in 100 gram packs) enoki mushrooms, steamed, blanched, or raw

PREPARATION

Vermicelli noodles:  Follow the instructions on the back of your vermicelli noodle.  I soaked mine in water for 5 minutes and then rinsed it out with hot water.  Set it aside to cool down.

Enoki mushrooms:  Rinse them under cold water, then cut off the thick stem that holds them together and slightly separate them before steaming or blanching.


INSTRUCTIONS

Combine the zucchini, bell pepper, garlic, lime juice, and the kaeshi sauce in a large mixing bowl.

Add the noodles to the bowl, then the parsely and the avocado.  Toss gently.

Garnish with more parsley leaves, scallion, and enoki mushrooms.


NOTE

I used kitchen shears to cut down my noodles.  It makes it easier to serve and to eat.


Fennel and Lima Bean Salad

Summertime salad with fennel and lima beans.

Summertime salad with fennel and lima beans.

My typical Saturday starts by running out the door alongside my little guy pedaling away to his 9 a.m. tennis lesson on the other side of Canal de l'Ourq.   Our speedy start to the day after tennis includes picking up our weekly basket of veggies, coming home to unload and rinse them, taking a shower myself and then preparing lunch before heading back out to Chinese school all afternoon long (two kids+ an hour and a half of Chinese class per kid at two different time slots—you do the math!) 

My Saturday reprieve is usually the moment when I pick up my AMAP veggies.  AMAP is an organized community group of subscribers who support local family farmers.  It usually involves a subscription to a yearly contract and in return one gets weekly and seasonal non-treated vegetables.   It is here that I exchange cheek to cheek kisses with some of the other Amapiens, discover vegetables like céleri rave and topinambour, learn new French words like oseille and panais, and exchange simple recipes such as this fennel bean salad — both ingredients happen to be in my basket this week. 

So while I chitchat away, my little guy is getting his hands soiled while selecting and weighing out our vegetables on a classic mechanical scale with a proper dial and hand to add to our basket of the week.
 

Fennel Lima Bean Salad

INGREDIENTS//Serves 2

• 200 grams Lima Beans, tinned, frozen or fresh (if you are lucky!)
• 2 small fennel bulbs, sliced
• 1.5 tablespoon Greek yogurt (optional)
• 1 clove garlic, grated
• Half a bunch of coriander, roughly chopped
• A splash of lemon juice, fresh
• Olive oil, drizzle accordingly
• 1 teaspoon sea salt


INSTRUCTIONS

In a medium size saucepan add about 1/3 cup of water and some sea salt.

Add the fennel and cook over medium-high heat for 8-10 minutes.

Then drain the fennel.

If using tinned beans empty the content into the same saucepan, stir and heat the beans.

For frozen beans, just boil them.

If using fresh beans, pick them off their pods and boil them.   I was stuck with a wan layer of its shell so I just peeled it off.   I found it easier to peel off after it was cooked.

Drain the cooked beans, add the grated garlic, squeeze some lemon juice, and drizzle olive oil over it.

Combine the beans and fennel. 

Add the yogurt (optional) and coriander and stir everything together.

Adjust with some salt if necessary.


Spaghetti Squash with a Splash of Red Curry Shrimp

SpaghettiSquashRedCurry1R.jpg

Oh là là...la rentrée est là!  It's back to school here for us Parisians.  After an 8 week summer break we are happy to be eating our local veggies again.  This week I came home with a spaghetti squash in my bag.  Its been a long while since I've had one of these.  I can actually say the last time I had it was when I was living in New York— ahem, that would be more than ten years ago.

Association pour le maintien d’une agriculture paysanne (AMAP), a French equivalent of a commmunity supported agriculture (CSA)

Association pour le maintien d’une agriculture paysanne (AMAP), a French equivalent of a commmunity supported agriculture (CSA)

While collecting my veggies of the week I overhead many fellow food community members struggling about how to season their spaghetti squash.  It seemed like many of them were not so excited to meet the spaghetti squash again this week (note: it's my first one I've encountered since I have been a wanderlust this summer). 

Fearing a bland and soggy outcome and not wanting to follow the traditional marinara sauce route because nothing is worse than non "al dente spaghetti" and red sauce, I opted for an Asian twist—I was not in a gratin state of mind either.

It turns out the spaghetti squash on its own has a slight buttery sweetness which you can taste through the red curry piquant sauce.  The assisting pineapple adds to that sweetness.  This dish is filling enough to eat as is but for the rice eaters out there, this is a great topper.

Big cheer to starting off the school year with a rah-rah spirit!

Spaghetti Squash with a Splash of Red Curry Shrimp

INGREDIENTS//Serves 4
• 1 Spaghetti Squash (mine weighed 1400 grams), roasted
• 1 small onion, chopped
• 1 tablespoon vegetable oil
• 1.5 tablespoon red curry paste (add more if you like it spicy)
• 125 ml ( 1/2 cup) coconut milk
• 1 teaspoon tamarind paste
• 150 grams pineapple, canned and cut
• 1 cup edamame beans
• 300 grams (23-25 pieces) shrimp
• 1 tablespoon fish sauce
• 3-4 stems fresh coriander
• 3-4 stems fresh Thai basil or regular basil

INSTRUCTIONS

Pre-heat your oven to 200° celcius.

Cut your spaghetti squash in half lengthwise.  Using a soup spoon scrape out the seeds.  Place it flat down on a baking dish and add a quarter cup of water to the pan to help keep the surface from drying out.  Let it roast in the oven for 40 minutes.  All ovens vary so slice a knife through the skin to see if it is tender.

Take it out and let it cool.

To prepare the red curry sauce, add your oil and onions in a pan and cook it until it becomes translucent. 

Combine the red curry paste, tamarind paste and half of the coconut milk and stir until it slightly thickens. 

Add the edamame beans and shrimp and let it cook until the shrimp turns pink and then add the fish sauce, the pineapple and the rest of your coconut milk. 

Stir in some fresh basil leaves and let is simmer on low heat until ready to serve.

After the spaghetti squash has cooled down, use a fork to pull out your spaghetti shreds lengthwise for longer "noodles".

Place it in a large serving dish and top it off with the shrimp red curry sauce.

Garnish with lots of fresh coriander and serve.


NOTE

I used frozen edamame beans and I put them in directly to cook with the sauce.  It only takes about 5 minutes for it to soften up.  You can also use frozen shrimp but just be aware that there will be more liquid content. 

If you don't have any shrimp on hand, salmon and chicken are good substitutes.


Kohlrabi Salad with Beetroot and Granny Smith Apple

Oh boy, it's hot in Paris.  I call it cani-kill but most properly in French it's canicule which is a scorching heatwave.    With temperatures reaching the high 30's (celsius) and even near the 50's for the poor bakers in the bakery, one has to remember to keep hydrated.   

No air con here—  this is living in France.   Air conditioners are not commonplace in France, especially in Paris where the city codes don't allow us to blemish their beautiful historic building facades.  So I sit in my bathing suit while writing this with beads of sweat dripping down the sides of my face, forming along the back of my nape, and rolling down my back and chest.  We are on a heatwave alert, level orange.

Fortunately, Paris has plenty of municipal pools and fountains.  Remember the scene from La Dolce Vita with Anita Ekberg wading into the Trevi Fountain—well, then you can imagine how lucky we are to be able to jump into the waters of our equally beautiful fountains in Paris and recreate that scene.   They are open to the public and it's a fantastic way to keep cool.

These days it's tough to muster up any energy to do anything, much less cook.   I've got a super simple recipe for us today.   Just chop, chop away these three crispy, hydrating and refreshing ingredients and voilà, the hard part is done.  Otherwise just throw it all in a robot (food processor in French) and let it do the work!

KohlrabiSalad.jpg

So raw & crunchy...and so simply delicious.   Stay cool.

Kohlrabi Salad with Beetroot and Granny Smith Apple

INGREDIENTS//Serves 2-4
• 1 medium size kohlrabi, matchstick
• 1 small size beetroot, matchstick
• 1 granny smith apple, matchstick
• 1/2 lemon, juiced
• Salt and pepper, adjust accordingly

INSTRUCTIONS

Combine the matchstick size kohlrabi, beetroot, and Granny Smith apple in a bowl.

Squeeze some lemon, drizzle with olive oil, salt and pepper to taste.


Marninated Zucchini, Carrot and Tofu Strips

MarinatedVegetableStripsR.jpg

Yes, I know it's freakin' freezing out there and this is what washed up ashore—a bunch of marinated raw veggies and tofu strips on a bed of trevise or radicchio as we know it.  Let me go back to dreaming of the black sand beach in Bali, the surfers, the sultry heat...

Marinated Zucchini, Carrot and Tofu Strips

INGREDIENTS//Serves 5-6

• 3 zucchinis, raw and peeled into noodle strips
• 2 carrots
• 150 grams tofu strips (optional)
• 1 lemon, juiced
•  1 clove garlic, minced
• 1/2 tablespoon tamari (or soy sauce)
• 1 tablespoon sesame oil
• 1/2 teaspoon white pepper
• A handful of coriander leaves


INSTRUCTIONS

To prepare your zucchini and carrot strips/noodles you can use a julienne peeler, handheld spiralizer, spiralizer, peeler, or mandoline.

Place all your veggie strips in a large glass mixing bowl and add the lemon juice and minced garlic.  Let it marinate overnight or for at least 8 hours in the refigerator.

Take the marinated vegetables out of the fridge and add your tofu strips, sesame oil, tamari sauce, and white pepper.  Toss all together.

Garnish with plenty of coriander leaves.

Dates, Nut, and Seed Toast

Sweet Seed Date Toast

This bread is chock full of seeds and nuts and is naturally sweetened with dates. 

Sweet Seed Date Toast

I love stumbling on new ideas and in this recipe it was using dried dates as a sweetener.  I've used date syrup in the past but I never thought of making it myself.   Then I came across this raw, homemade date syrup recipe in The Kitchn.

Toast served with St. Môret cheese spread, a slice of cucumber, smoked salmon, chives, and white onions.

Toast served with St. Môret cheese spread, a slice of cucumber, smoked salmon, chives, and white onions.

I was unsuccessfully trying to make granola bars using my own adaptations from Deliciously Ella's Date and Oat bars recipe...

Sweet Seed Date Toast

but I successfully turned it into toast bits that go great with dips and spreads.  They are packed full of nutritious seeds.  Add a nut butter spread to it and you've got a great "start the day off right"  kind of breakfast or a "pick me up energy snack" for the afternoon.


Dates, Nut, and Seed Toast

INGREDIENTS//Yields 36 squared pieces

• 2 cups (220 grams) buckwheat flakes (unroasted)
• 1/2 cup (70 grams) sunflower seed
• 3 tablespoons chia seed
• 1/2 cup (90 grams) flax seed
• 100 grams Brazil nuts, finely chopped     
• 12-15 dates, pitted (use 15 for a touch more of sweetness)
• 1/2 cup (100 ml) coconut oil
•  1 1/4 (300ml) cup water
• 1/2 cup amaranth (30-40 grams), popped (optional-I had some on reserve)  Use 3 tablespoons raw amaranth to get 1/2 cup popped amaranth.

PREPARATION

Let the chia seeds sit in 12 tablespoons of water for about 15 minutes.  It will become gelatinous.
Pop your amaranth seeds if you don't have some on reserve.

INSTRUCTIONS

Combine the buckwheat flakes, sunflower seeds, flax seed and Brazil nuts in a large mixing bowl.

Put your dates and coconut oil in a blender and mix with 1 1/4 cup water.  Blend until you get a nice smooth consistency.

Add this to the ingredients in the large mixing bowl and stir to combine everything.

Once the chia seeds have set into a gelatinous state, add this to the mixing bowl and stir.

Line a baking tray (33x20 cm or 13 x 9 inch tray) with parchment paper making sure that you use more than enough parchment paper so that it pulls up on the sides.

Fill your tray with the seed date toast mix.

Sprinkle the popped amaranth seed all over the mix and using the back of a spatula, spread it across evenly press down to flatten and smooth out the mix.

Bake at 150°C for 30-40 minutes or until the top turns golden brown.

Let cool and set for at least a half an hour.  Then cut up into square shape bite size toasts.  They will be around 2 centimeters thick, then slice through the middle to divide into two to get about 1 centimeter slices of bite size toast.

Place it back in the oven open face up and toast until the top turns golden. 

Let it cool.  These can be stored in a seal tight container for up to a week.


NOTE

I divided the length into six parts and the width into three parts which yields 18 pieces.  Then I divided the 18 pieces by slicing through the middle which yields 36 pieces of toast.  You can store these in a seal tight container for up to a week.


Homemade Fruit Popsicles

Fruit flavors, coconut milk, and agave syrup.

Fruit flavors, coconut milk, and agave syrup.

Early Sunday morning as I stepped out the door on my way to the market, I was greeted by brisk weather.  We had a heat wave just up until then so the contrast was startling.   A surge of anxiety immediately entered my head—Where did I store the children's down jackets?  Time to pack up the summer clothes (gosh, didn't i just take them out a month ago?)  And the comforters?...

Piña colada flavor.

Piña colada flavor.

At the market, my hoarding tendencies shone through and I quickly filled my bag up with as much summer fresh fruit as possible. We never know when that dark, grey nimbostratus cloud may appear and disappear.  If we are lucky, by next spring we will see sunshine again.  That was me heading into panic mode.

We love berries & coconut and mango coconut flavor.

We love berries & coconut and mango coconut flavor.

That all went away rather quickly.  The sun proved stronger and stuck around.  I came home with a load of fresh fruits, spent the following days making different flavor fruit popsicles, and eating them on our balcony in the sweltering heat with the kids.

We clung onto our last summer days together, sucking down our popsicles before heading back to school today.  After the long summer hols, people are back at work, and children are back to school.  Paris has resumed its daily rhythm.  In France, they call it la rentrée.  Wishing everyone a bonne rentrée!
 

Homemade Fruit Popsicles

INGREDIENTS//Yields 8 popsicles (2 ounce molds)

• Fresh fruit
• 1 cup coconut milk  
• 3 tablespoons agave syrup or maple syrup
• 1 lemon


INSTRUCTIONS

You will probably have to adjust the quantity of fruit and coconut milk to fill your popsicle mold. 

We chose to make different fruit flavors for each popsicle holder so we blended each concoction individually and then filled the mold.

Prepare your coconut milk by adding 3 tablespoons of agave syrup to it.  Stir to combine.

Choose a couple of pieces of fresh fruit (don't be afraid to mix and match!), add two tablespoons of coconut milk, and squeeze a couple of drops of lemon juice.  Blend it, fill your mold, and then freeze it.


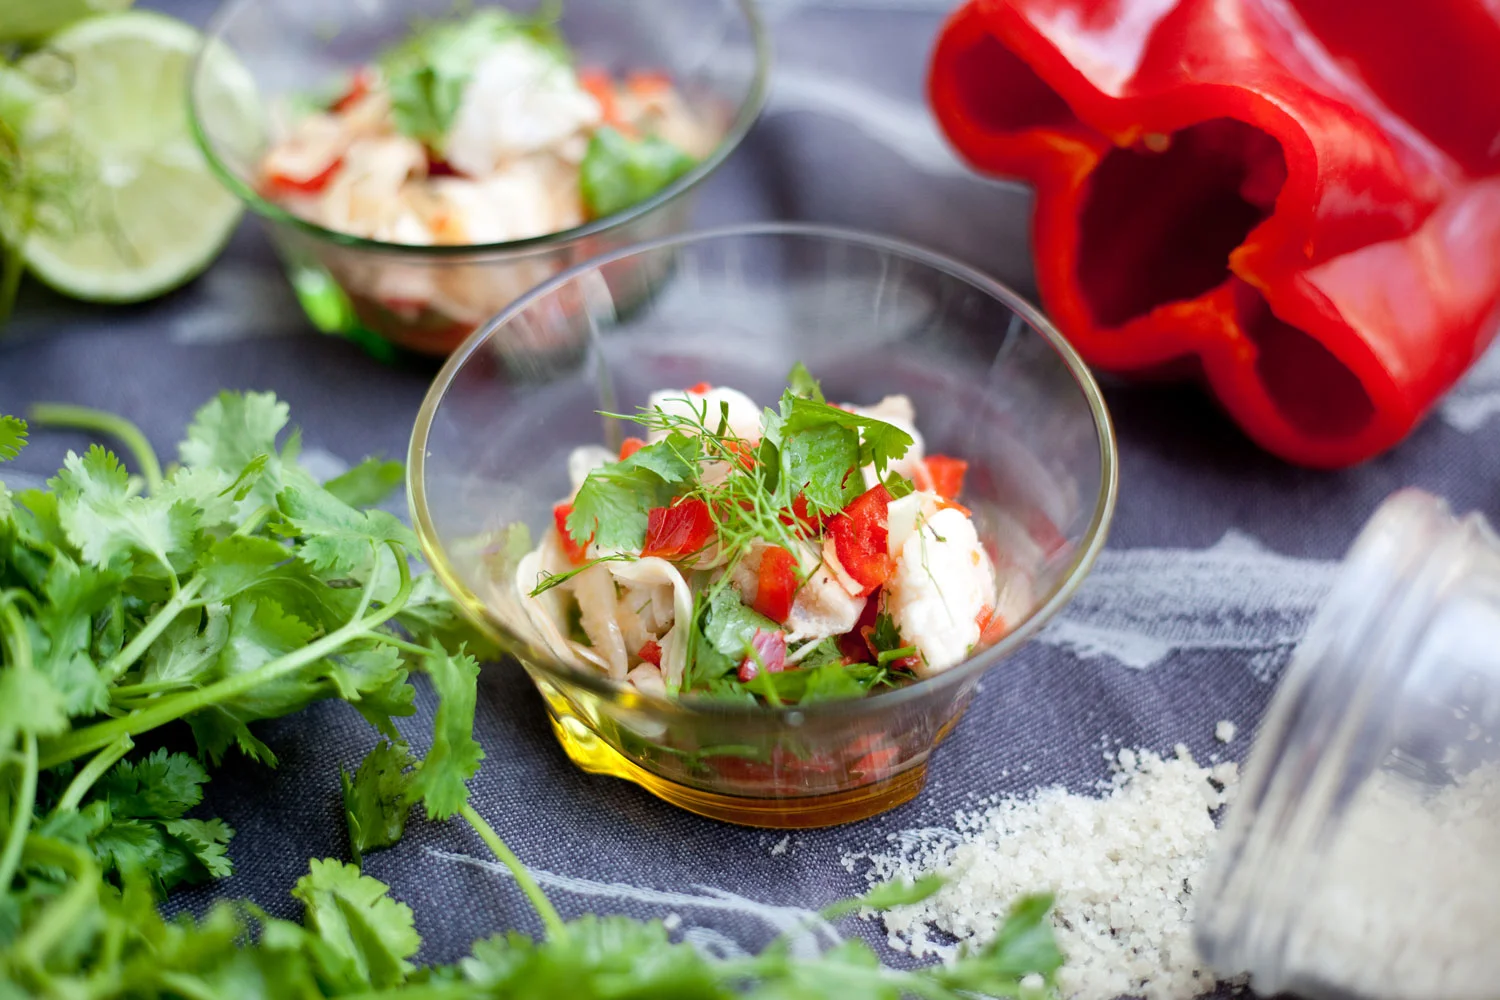
Market Fresh Cod Ceviche

Fresh Market Cod Ceviche

Market Fresh Cod Ceviche

INGREDIENTS//Serves 4

• 350-400 grams cod fish —high quality, fresh, de-boned, filleted, skinned, and pin bones free
• 1 small-medium red pepper, deseeded and diced
• 1 small fennel with its fronds, sliced thinly, fronds picked
• 1 spring onion, sliced finely
• A few sprigs of coriander—leaves picked, stalks chopped
• 2 limes, juiced or 1 lime and 1 small orange, juiced
• 1 teaspoon sea salt
• 1 teaspoon espelette pepper purée, sriracha sauce, or tabasco
• extra virgin olive oil, optional
 

INSTRUCTIONS

Prepare your pepper, fennel, spring onions, and coriander.  Place it on the side.

Cut your filleted fish into small chunks and place it into a pyrex mixing bowl.

Add the salt, lime-orange juice, and the chili pepper to the fish and toss it around.

Place it in the refigerator for 15-30 minutes making sure to toss it around every so often.

When the sides are marinated, the color will turn opaque.  Take it out of the refigerator.

Add the pepper, fennel, and spring onion to the marinated fish and toss together.

If needed, add some more salt accordingly.

Then add the coriander leaves, a bit of the chopped sprigs and toss it together.

Garnish with the fennel fronds.

Divvy it up, drizzle a touch of olive oil and serve immediately!


NOTE
Spring onions or scallions as we call them in the U.S. are known as oignon nouveau, oignon frais, or cébettes in France.  The ones in France seem to have a larger bulb so I can easily slice them along a mandoline. 

Onigiri, Japanese rice balls packed full of wholesomeness.

There was one year during my elementary school years where I brought a bento box lunch as opposed to a brown bag lunch.  I say one year because I went to about 4 or 5 different elementary schools and for some particular reason I really remember lunch time at only one particular elementary school. 

This was the year my uncle, Iichigawa-san from Japan, came to stay with us.  He would make me rice balls stuffed with umeboshi, a Japanese pickled salt plum (my favorite) or fill them with pieces of salmon or ikura (salmon roe) for my bento lunch.  Sometimes they were round like a ball and sometimes they were shaped into triangles. Sometimes they were wrapped with nori (seaweed) and other times just sprinkled with furikake, mixed savory sprinkles.

This is when I had my Molly Ringwald moment from The Breakfast Club  "sushi lunch scene"—so if you can imagine what the kids' reactions were towards sushi in the 80's...I clearly wasn't the most envied one while chomping down into my black seaweed covered rice balls.

Seaweed is a health food and sushi has gone global.  I now make this with flavored rice, experimenting with different grains, beans, and seeds and adding shredded vegetables into the mix.   It's practical for picnics and makes a great snack.  Create your own onigiri according to your own tastebuds!

Onigiri (Japanese Rice Balls)

INGREDIENTS//Yields 4

• 2 cups Japanese short grain rice
• 1/2 cup roasted buckwheat groats (kasha)
• 1/2 cup adzuki bean flakes
•  1 small avocado
• 2 sheets of Korean style roasted seaweed
•  yukari (dried shiso leaf powder)
•  sesame seeds
• 1 tablespoon amaranth seed, popped


INSTRUCTIONS

In your removable rice cooker pot add the rice and rinse with water using your hands to swish the rice and water around.  The water will be cloudy.  RInse until it gets less cloudy.

Add the buckwheat and adzuki beans, and fill the pot with water to the point where indicated for 3 cups of water—I usually add 1/4-1/2 cup water more.

Place it back in your rice cooker and select the mode for cooking rice.

When cooked, using your rice spatula genlty flip through the rice to fluff it up a bit.

Let the rice cool down before handling.

If using a onigiri triangle mold, wet it beforehand so that the rice does not stick to it (remember to do it before each one).

Simply fill the mold with rice just below the halfway point and create a dent in the middle.

Scoop out a quarter of the avocado and place it in the middle.  Be careful not to overstuff.

Fill the top half with the rice mixture press down with the lid onto the rice.

Take the lid off, flip over the mold, and press down on the flexible backside to push out the rice.

You can also use your hands to mold the rice into balls or triangles: Keep your hands wet, spread the rice out on the palms of your hands, place the fillings in the center, fold up the rice around it, pack it tightly with your hands, and form it into the shape you like. 

Sprinkle it with some sesame seeds and/or yukari (adds a tangy and slightly salty taste), and popped amaranth seeds.

Cut your Korean roasted seaweed in half lengthwise, place the rice triangle in the middle and fold up the sides of the seaweed pressing the seaweed into the rice so that it sticks.  Bend the top flaps of the seaweed down along the sides of the triangle so that the rice triangle is entirely wrapped.


NOTE

I use Korean or Japanese seaweed.  Korean seaweed is more flavorful because it is roasted with oil and salt.  Check the ingredients list making sure it is short and not added with additional salt, sugar or artificial ingredients.

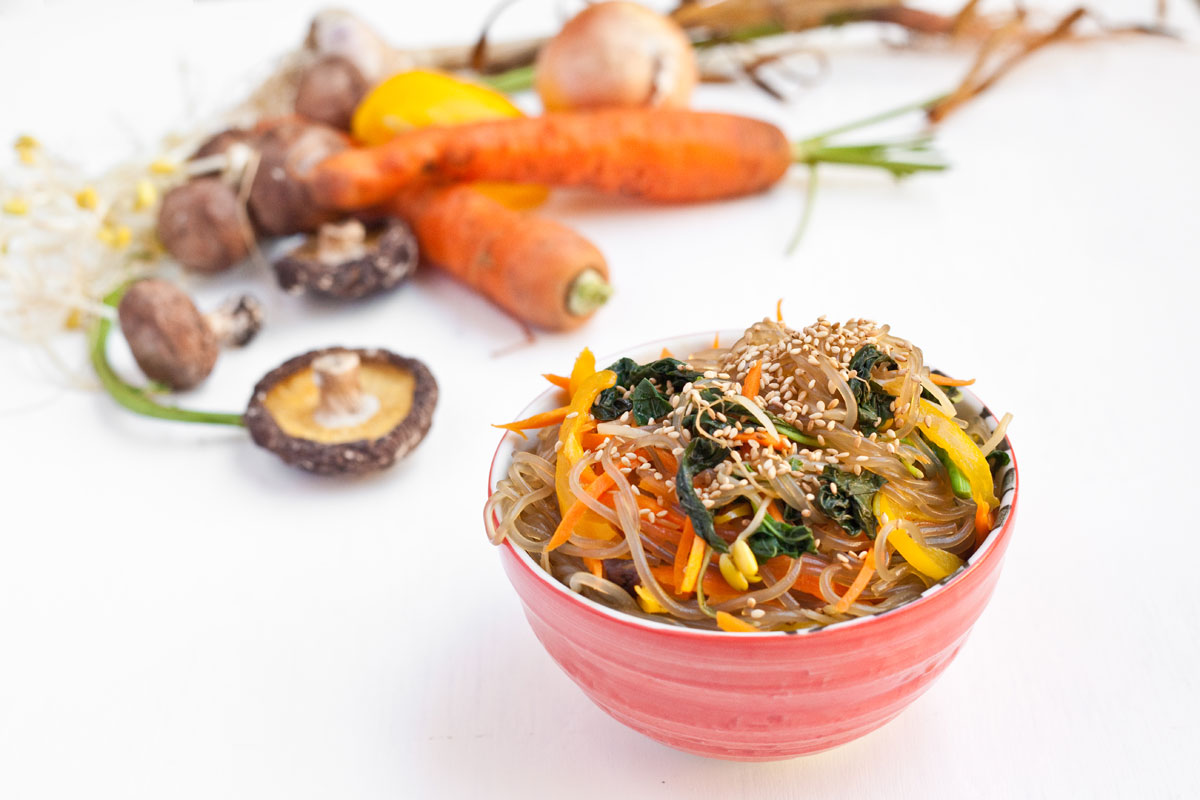
Japchae (Korean Sweet Potato Noodles with Veggies)

Japchae1Resize.jpg

My days in Koreatown in Manhattan and in Flushing, Queens are long gone.  Paris has its share of Korean restaurants but I can't say it compares to the plethora of choices given on a one block radius of Manhattan.  And this one block radius is just a tiny representation of the many blocks of which Korea Way stretches along, 5th Ave through to Broadway on W32 streets.   Apparently, it is paving its way in the other direction too— towards Madison. 

My penchant for discovering new ingredients or different ways to cook them up stems back to my youth: influenced by my parents, who love to eat, cook and dine out;  feeding my soul and stomach through my travels; and eating my way through NYC during my college years—lots of interesting 24/7 eateries to be discovered in the wee morning for after hours clubbing.  One of those stomach refuelling pit stops was at a Korean restaurant called Kang Suh.  Ahh, those were the days...

Fortunately, I have good Korean friends who can cook.  They have educated me and shared their recipes throughout the years.  Now I can whip up the Korean basics and just re-create the past.
 

Japchae (Korean Sweet Potato Noodles with Vegetables)

INGREDIENTS//Serves 4

• 200 grams (7 ounces) dangmyeon (Korean sweet potato noodles)
• 1 small onion, sliced thinly
• 1 carrot, julienned
• 1 pepper (red, yellow, or orange), sliced thinly
• 3-4 shiitake mushrooms, dried or 100 grams small white "button" mushrooms (aka champignon de Paris in France), sliced thinly
• 100 grams of bean sprouts
• 100 grams fresh spinach
• 1-2 cloves garlic, minced
• 1 egg, whole (optional, opt-out if going the vegan route)
• 1-2 tablespoons sesame seeds

Sauce
• 4 tablespoons soy sauce or tamari (gluten-free option)
• 1 1/2 tablespoon honey or 1 tablespoon brown sugar (vegan option)
• 1 tablespoon sesame oil
• 1/2 teaspoon black pepper

PREPARTION

If using dried shiitake mushrooms, you need to soak them at least a few hours (I soak them in the morning for evening use) in advance in room temperature water.  Put them in a bowl of water and swish them around with the stem side down.  Once they are plumped up and soft, give them a squeeze and set them aside for later use.

Slice and julienne all your vegetables: the mandoline comes in handy.

For the egg topping, seperate your egg yolk and white.  Fry them up seperately in a pan and then slice it up into matchstick pieces. 

INSTRUCTIONS

Prepare your sauce and rinse all your vegetables.

Bring a large pot of water to boil and then add your dangmyeon.  Follow the instuctions on the back for the time.  It's usually around 5-7 minutes.

During this time, marinate your mushrooms in one tablespoon of the prepared sauce.

Transfer the cooked noodles to a colander and rinse under cold water, drain, and put them in a large mixing bowl.

Rinse out your pot, add water and bring it to a boil in order to blanche your spinach and your bean sprouts at the same time.  Basically you want to boil your spinach and your bean sprouts for a short amount of time (1-2 minutes), then quickly rinse it under cold water. 

In a seperate bowl, add the minced garlic and sea salt.  Squeeze out the remaining water from the spinach and the bean sprouts and rub it into the garlic and sea salt.  Let it sit.

In a single medium size pan, add some cooking oil to stir fry your vegetables seperately in this order: onion, pepper, carrot, and mushrooms. 

Transfer each ingredient after it's cooked to a bowl set aside.  The vegetables should not be cooked until limp.  It's nice when they keep their color and still have a slight crunch to them.  So keep the cook time short.

Add the prepared sauce into the mixing bowl with the noodles and stir in all your cooked ingredients. 

Garnish with lots of sesame seeds and your egg toppings (optional).


NOTE

I picked up an organic basket of veggies this week and I had a stalk of amaranth included in it.  I have only purchased the grains in the past so I didn't even know what the plant resembled.   It had some leafy greens on it, so I plucked them off and used it in place of the spinach.   It was a great substitution.

You can also add beef to this dish: slice up your beef, marinate it with prepared sauce in the same bowl with the mushrooms, and stir fry it together.

This is a dish that can be eaten cold, at room temperature, or hot.  If you want it hot, simply place all the ingredients back into the pan to heat up before serving.


Katsuobushi Dashi

Ingredients for katsuobushi dashi stock.

Ingredients for katsuobushi dashi stock.

This is a follow up on my vegetarian dashi recipe as most of the time dashi stock in Japanese cuisine is a blend of katsuobushi and kombu.  As mentioned in my previous post, you can have a variation between dried kelp (kombu), dried bonito flakes (katsuobushi), dried shiitake mushrooms and small dried fish for dashi. 

Katsuobushi is a Japanese dried, fermented, smoked skipjack tuna.  Back in the day, a block of katsuoboshi would be kept at hand and when needed; they would simply shave off what was needed on a wood plane.  If you are a die-hard traditionalist you can still purchase blocks of this tuna and make shavings for yourself at home.  Not only is it used for stock, it can be added to enhance flavors as a seasoning, topping, and stuffing.  It also has an aesthetic effect when placed on hot foods; the thin shavings start to move and and shrivel down.

Katsuobushi Dashi Stock

Katsuobushi Dashi Stock

Katsuobushi is easily found in the Japanese and health food stores and its flakes are usually sold packaged in a transparent sealed bag.  It's also rich in umami flavors especially when combined with kombu in this stock.

Katsuobushi Dashi

INGREDIENTS//Yields approx. 1 liter

•  1 liter water
•  1 piece kombu (about 12- inches long)
• 10-15 grams katsuobushi

PREPARATION
In a bowl, steep your kombu in a litre of water overnight or at least 15-30 minutes beforehand.

INSTRUCTIONS

Fill a large pot with the llitre of water and the steeped kombu.

Bring it to a simmer and just before it comes to a boil, fish out the kombu.
 
At boiling point, quickly add the katsuobushi and turn off the heat.

Let it sit for 10 minutes or until the katsuobushi sinks to the bottom.

Strain the stock for use right away or let it cool and pour it in a container, seal tightly, and then refigerate for another time (holds up to 3-4 days).


NOTE

Such as the Kombu dashi stock recipe, the ingredients can be re-used right away to make a second stock referred to as niban dashi.  The first stock is usually stronger in flavor and is referred to as ichiban dashi.


Summer Soba Noodles

Green tea soba with seasonal vegetables and shredded nori.

Green tea soba with seasonal vegetables and shredded nori.

Alas, summer is here.  I wouldn't have guessed it, and neither would you if you had seen me recently walking around town with a light sweater, sleeveless-down vest and a scarf on—oh, and an umbrella to boot.  It wasn't until I got into the elevator when my neighbor greeted me and reminded me that summer has arrived, and then it began to dawn on me.

Peppy and eager, even through the thick of rain and gray clouds—ahh, but summer is here—to share my summer lovin' soba noodle dish with my family and friends, I bought some green tea soba noodles (photos above) and the typical buckwheat noodles (photos below) to add some fun for the kids. 

Soba Noodles with tofu strips

Soba Noodles with tofu strips

You can add your choice of vegetables and protein to make it your own perfect summer dish.  Alas, the sun is shining—for summer is here. 

いただきます! 

Itadakimasu!

Summer Soba Noodles

INGREDIENTS//Serves 4

•  400 grams soba noodles
•  1/2 red pepper, raw and sliced finely
•  1/2 orange pepper, raw and julienned
•  2 zucchini, raw and julienned entire length (think zoodles!)
• 200 grams tofu strips
• 2 scallions, finely sliced

Homemade tsuyu sauce

• 1/2 cup kaeshi
• 3/4 cup dashi

PREPARATION

Rinse and wash well your pepper, zucchini, and scallions.

Cut your pepper in half and rinse out the seeds.  Use a mandoline with just the blade (no teeth), slice finely your pepper.  Place it in a bowl and set it aside.

Peel alternating slices of the zucchini skin off to give it some texture and color.  Run it along a mandoline using the blade with the fine teeth blade lengthwise until you reach the seeds, then turn it and repeat.  Discard the seeds. Place it in a bowl and set it aside.

Slice your scallion.  Place it in a bowl and set it aside.

Sauce: Mix the two parts together and set it aside.

INSTRUCTIONS

Fill a large pot of water and bring it to boil.

Add the soba noodles following the instructions on the back of the package for cooking time.

Drain your noodles in a colander.  Transfer it back into the pot with running cold water.  Press the noodles down with your hand if they start coming up over the pot.  Use your hands to separate the noodles and aid the rinsing process to wash away the starch.  Drain the noodles again.  Begin to separate and place them in the four serving bowls.

Add a handful of zoodles, peppers, and tofu strips.  

Mix in your sauce and top it off with some scallion and sesame seeds.

NOTE

Tsuyu sauce can be found in most Asian stores.  It is usually sold concentrated.  Dilute it with water, just enough to keep its flavor but not so much that it tastes watered down.


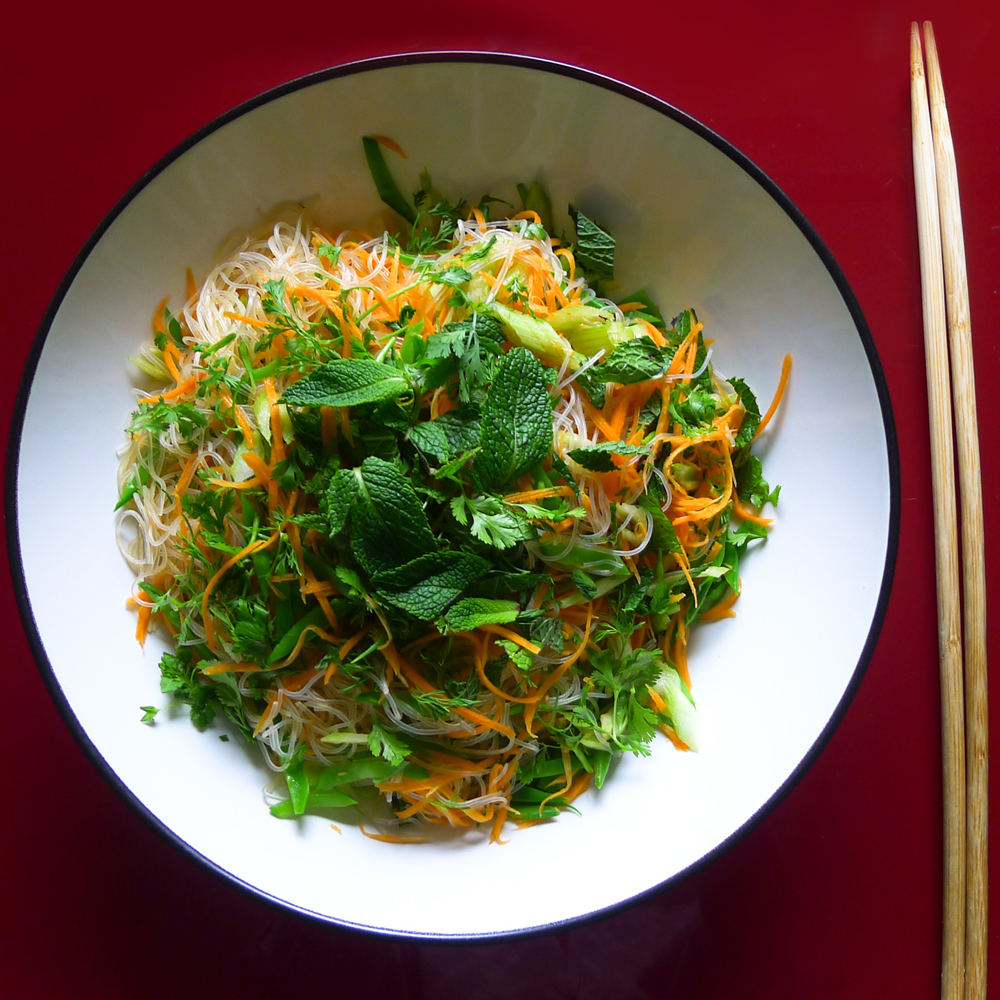
Glass Noodle Salad

GlassNoodleSalad.jpg

I recall visting Thai friends on lazy, sweltering afternoons in their homes and finding their extended family members under the influence of indolent heat, sprawled out on timeworn floors of the veranda supported by equally timeworn stilts peacefully resting in the shade.  It made me want to do the same and I was welcome to lay out my sarong and find a spot.  A comfortable position would soon be found; I was happy to have escaped the sun rays, dust billows from back country roads, and scooter vibrations relishing the shade and tranquility until a platter of fresh herbs and vegetables would arrive with some nam phrik, a chili shrimp paste based sauce, to dip into.  Slowly, the family members would wake; sounds of squeaks and creaks from the wooden planks and shuffling would stir as they gathered around the platter to share this afternoon snack.  As I bit into this fresh, crisp combination of raw herb and vegetable dipped into nam phrik on this hot and lazy, sultry day my senses had been awakened.

While eating my way through Thailand in the early 90's, my palate received an education in appreciation of fresh herbs and raw vegetables.   A habit I picked up is adding fresh herbs (herbs! herbs! herbs!) to almost everything.  I love that it simply livens any plate up with subtlety and adds bursts of flavor to it.   In this glass noodle dish, be very generous with your herbs. 

Glass Noodle Salad

INGREDIENTS//serves 8-10

• 500 grams cellophane noodles (a.k.a vermicelli bean thread, glass, and mung bean noodles)
• 7 whole carrots, raw and julienned
• 250 grams snowpeas, raw and julienned
• 2 celery branches (optional), raw and julienned
• 1-2 bunches of fresh coriander
• Bunch of fresh mint

Dressing

• 1 shallot, minced
• 2 cloves garlic, crushed
• A thumb-sized piece of fresh ginger, grated
• A thumb's length of lemongrass (optional), slit lengthwise and bruised slightly
• 2 tablespoons or 50 grams palm sugar or regular sugar
• 1/2 cup sushi vinegar or apple cider vinegar
• 2 tablesoons soy sauce or tamari sauce (gluten-free)
• 1 tablespoon Sriracha
• 4 tablespoons sesame oil
• 2 whole lime
• 2 tablespoons Thai fish sauce or Vietnamnese vegetarian fish sauce

INSTRUCTIONS

Bring a big pot of water to boil and then turn it off.  

Soak the noodles in the boiled water for 5-7 minutes.  Drain.  Then run under cool water and drain again.  The noodles will look white and translucent.  Transfer it to a large mixing bowl.

Add some sesame oil to the noodles to keep them from sticking. 

Using a pair of kitchen shears, cut through the noodles to shorten their length.  Leave on the side and begin to prepare the vegetables. 

Combine all your prepared raw vegetables in a medium mixing bowl and set it aside.

Rinse and dry your coriander and mint.  Tear the coriander leaves and the mint leaves off their stems or simply use your kitchen shears and trim the herbs into a bowl. 

Combine your noodles and vegetables.  Add the dressing. 

Toss together, add the herbs, and toss again.

This is a great dish to prepare in advance.  I find the longer the noodles and vegetables sit in the dressing, the more flavor it soaks up.

DRESSING

In a measuring cup add the shallot, garlic, ginger, lemongrass, and palm sugar. 

Pour in the sushi vinegar, add the tamari (or soy sauce), the Sriracha, sesame oil and the juice of the whole limes.   Stir until all the ingredients are mixed in together.  (If you don't mind bits and pieces of the shallot, garlic and ginger—this is the way I do it by hand.  Otherwise, throw everything into a blender although you will have pulp from the ginger so you'll have to pass it through a strainer).

If you use lemongrass, let the dressing stand (the longer the better—for at least an hour) until the flavor of the lemongrass infuses into the dressing.  Then discard the lemongrass and mix the dressing in with the noodles in the mixing bowl.  Add the vegetables and herbs and toss until everything is coated with the dressing.

NOTE

You can switch your vegetables up between carrots, beansprouts, snow peas, celery and whatever other vegetable you imagine to go along with it.  My favorite combo is with carrots and snowpeas.  You can also top it off with some tofu, shrimp or morsels of chicken.