Time For Apéro— Gressins, Grissini, Breadsticks

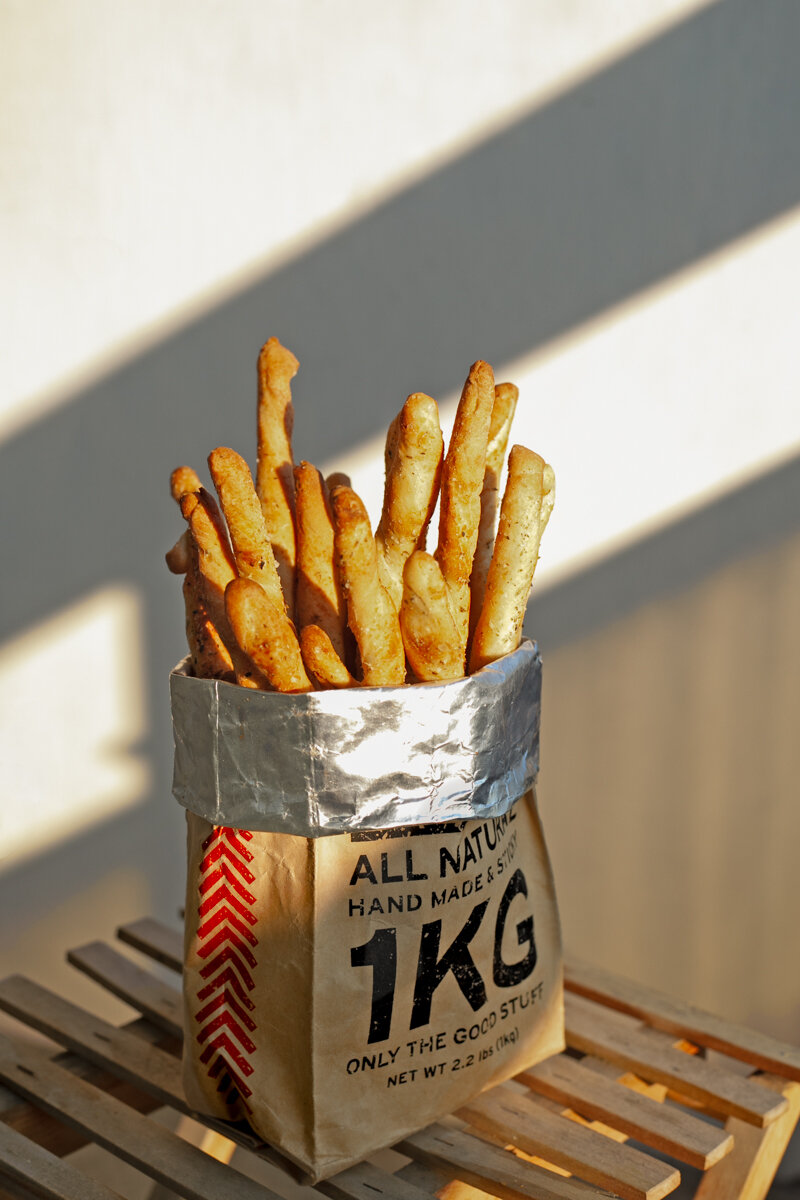
Breadsticks accented with parmesan and oregano.

Breadsticks accented with parmesan and oregano.

Ahhh, the golden hour. Nothing beats a moment like soaking in the light just before the day’s end; a perfect backdrop to apéro, where friends get together for pre-evening drinks. To me, apéro is like happy hour; it’s drinks with the radishes, charcuterie, pâté, olives, veggie sticks and/or dips. If you want to get even fancier, you can flaunt your stylish verrine glasses to star your amuse bouche; however, It can also be as simple as having a bag chips and nuts.

Apéros can override dinner and last late into the night. My only gripe with it is not knowing whether dinner will follow or not, and not being able to gauge how much I should eat and drink just in case the main course does make an appearance with that special bottle of reserved wine. Apéros can be held in the comforts of one’s own home or sprawled out in a common open space, with those extras I mentioned above. Bascially, if you find a nice spot and have nice weather, you can just plop yourself down anywhere and start your apéro…simple as that.

Hosting apéros is not my forte but I am the perfect guest. Invitations are nil now—it’s Corona’s fault. Since confinement, “Zoom” and “Houseparty” apéros have popped up. It’s really not my thing but I can appreciate it on occasion. I’m holding out for the real thing.

We’ve been blessed with beautiful weather since our lockdown. Most of the days, hubby and I are lucky enough to step out onto our balcony to enjoy the warm embrace of the sun rays. We’ve been keeping apéro to a minimal— as it tends to override dinner and last late into the evenings— otherwise, our diet would consist of just pastis and peanuts. So remember, I am that perfect guest.

Breadsticks accented with parmesan and oregano. Call it gressins, grissini, or breadsticks but they have one thing in common; they are crunchy.

Breadsticks accented with parmesan and oregano. Call it gressins, grissini, or breadsticks but they have one thing in common; they are crunchy.

On a late afternoon, hubby and I were glowing away under the spell of the golden hour with a pastis in hand ready to make a birthday toast to our friend, Stéphane, over a computer screen. We found him and his wife crunching away on these homemade breadsticks with a glass of wine in hand. Always so elegant.

I received this homemade gressin recipe in my inbox the next day. Stéphane makes everything from scratch and he’s my go-to guy when I have any doubts about French cooking. He doesn’t complicate things although he has the patience to make intricate recipes when he wants to and he’s also very generous in sharing cooking tips and recipes. He’s also on my list for a Peek in the Kitchen, so keep an eye out for him. Lucky him, he’s paired up with Sandrine, who makes the most delectable desserts. Together, they are very crafty with their hands; they love to while away time thrifting through flea markets. Their house is designed with pieces they refurbish and thoughtfully decorated with the hidden gems they find. Often, apéro is served in some old find of theirs which lends to beautiful stories shared with us. This is one of my favorite places to be invited to for apéro, something is always cooking or coming out of the oven.

Gressins

INGREDIENTS//Yields approximately 2 1/2 dozen

• 500 grams flour
• 10 grams salt
• 3 grams sugar, finely granulated sugar
• 15 grams fresh yeast (I used dry yeast)
• 240 ml water, room temperature
• 90 ml olive oil
• A handful of semola (optional)
• A handful of your preferred choice of drid herbs, grains, and/or parmesan cheese.

INSTRUCTIONS

Sift your flour into a large mixing bowl and combine wtih the sugar and salt. Make a well.

Seperately, activate the yeast in the room temperature water. Then pour it along with the olive oil into the well of the dry mix.

Knead quickly with your hands or with a dough mixer. If you are kneading with your hands you may want to dust your hands with some extra flour and knead the dough until it becomes a smooth malleable ball that doesn’t stick and springs back when you push a finger into it. (Kneading by hand takes about 12-15 minutes)

Cover the ball of dough with a tea towel and let it rest for 15 minutes.

Dust your dough with flour and flour your workspace. Place your ball of dough on the workspace and start to press down on it with the heel of your hand and roll it out.

Roll it out into an oblong shape, then fold in the ends to meet in the middle, and then fold again in half.

Turn the folded dough so that the longer ends are at the top and bottom, roll it out and repeat one-two more times.

Roll it outand shape it into a rectangular shape about a half inch thick to fit on your baking sheet. Cut around the edges to create a smooth edge.

Line your baking sheet with parchment paper and dust it with some semola, then transfer the dough onto it.

Lightly brush the surface of the dough with some olive oil nd sprinkle your choice of dried herbs, grains, and parmesan cheese all over along with a small handful of semolina. Press it in with the palm of your hands.

Cover with cling wrap and let it sit for an hour and a half in room temperature. It will rise.

Preheat your oven to 190 degrees celsius( 375 degrees fahrenheit)

Cut the dough into 1.5 cm width strips (you can twist the strip in opposite directions) and place it on a seperate baking sheet . Place them about an inch and a half apart.

Place in oven for around 6-8 minutes depending on your oven or until golden.

Let it cool on the rack. It should be nice and crunchy.

What's the Secret Ingredient to this Veggie Burger Patty?

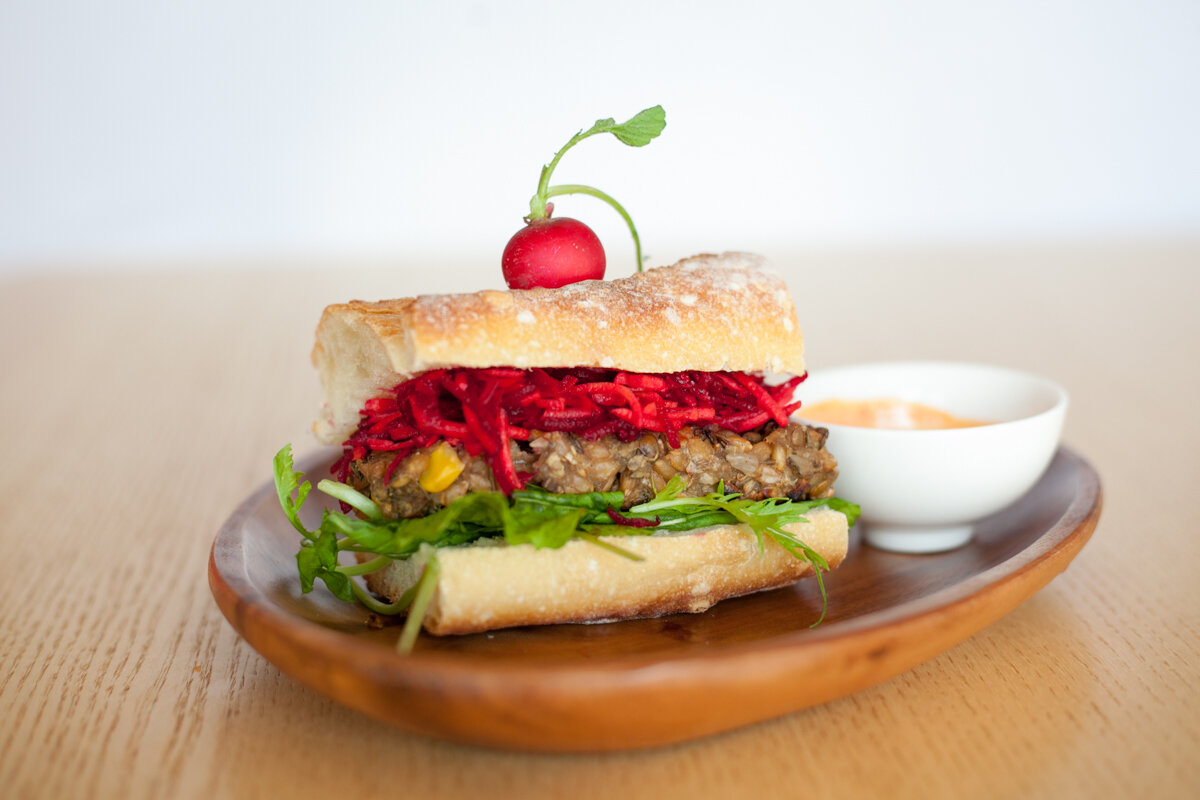
Lentil veggie patty with arugala, grated beets and carrots with a sriracha mayonnaise sauce sandwiched between a baguette.

Lentil veggie patty with arugala, grated beets and carrots with a sriracha mayonnaise sauce sandwiched between a baguette.

A friend of mine called me up the other day asking if I had a good veggie burger recipe and I admitted to her that I didn’t. All my previous attempts left me unsatisfied and salivating for a memorable veggie burger that I last had in NYC. Back in my old days—the early 90’s— portobello mushrooms were the fab fungus about town, that’s what veggie burgers were made of. Restaurants could put these on their menu since it sold itself as an exotic and meaty-tasting mushroom and it was the perfect meat substitute to lure all the vegetarians and diet conscious crowd; turning it into the ultimate veggie burger by-product. It became so popular that it turned into a household staple and made it easy to host vegetarians at barbecues alongside the carnivores. Ah yes, there was the Boca Veggie Burger option too, a frozen soybean-based patty sold as a health alternative to the meat patty. Those were the days.

I miss those mushrooms, I don’t find them easily in Paris. Nowadays, veggie burgers are found everywhere and their main ingredient seems to be beans.

LentilVeggiePatty-7251.jpg

In my kitchen lab faced with the leftover lentils I ponder about the major issue I have with a poorly made veggie burger. For me, it’s the texture—no mushy patties please!

I decided to keep to a standard recipe which calls for any type of beans with lots of herbs and spices; seeds and nuts; and rice or quinoa.

LentilVeggiePatty-7262.jpg

It’s complicated these days to run about town in search of specific ingredients. I used whatever was in my pantry and that’s how I stumbled upon my secret ingredient, le petit épeautre (small spelt grain). I agree this is not something you would find easily in a supermarket nor a product that most of you would have on hand but it is easily found in a healthfood store. For me, this did the trick. It substituted the rice, quinoa, oats, the grain part of the recipe and it really was the best replacement I have used to give it that true grit. It adds a nutty and meaty heartiness to the veggie burgers made with beans. All of a sudden, my burgers were not so mushy anymore.

The secret ingredient, petit épeautre , which is a small spelt grain. Unfortunately, there is none left over to show you what they look like: it’s across between brown rice and barley in shape and color. I was lucky enough to find them in my pantry.…

The secret ingredient, petit épeautre , which is a small spelt grain. Unfortunately, there is none left over to show you what they look like: it’s across between brown rice and barley in shape and color. I was lucky enough to find them in my pantry. I usually use this grain as a rice substitute for salads. It doesn’t get soggy.

I also grilled the patties this time rather than just cooking them in a pan. Honestly I can’t tell you if it turns out the same way; we all enjoyed them so much grilled that I didn’t get a chance to cook them on a pan. I’ll let you know next time.

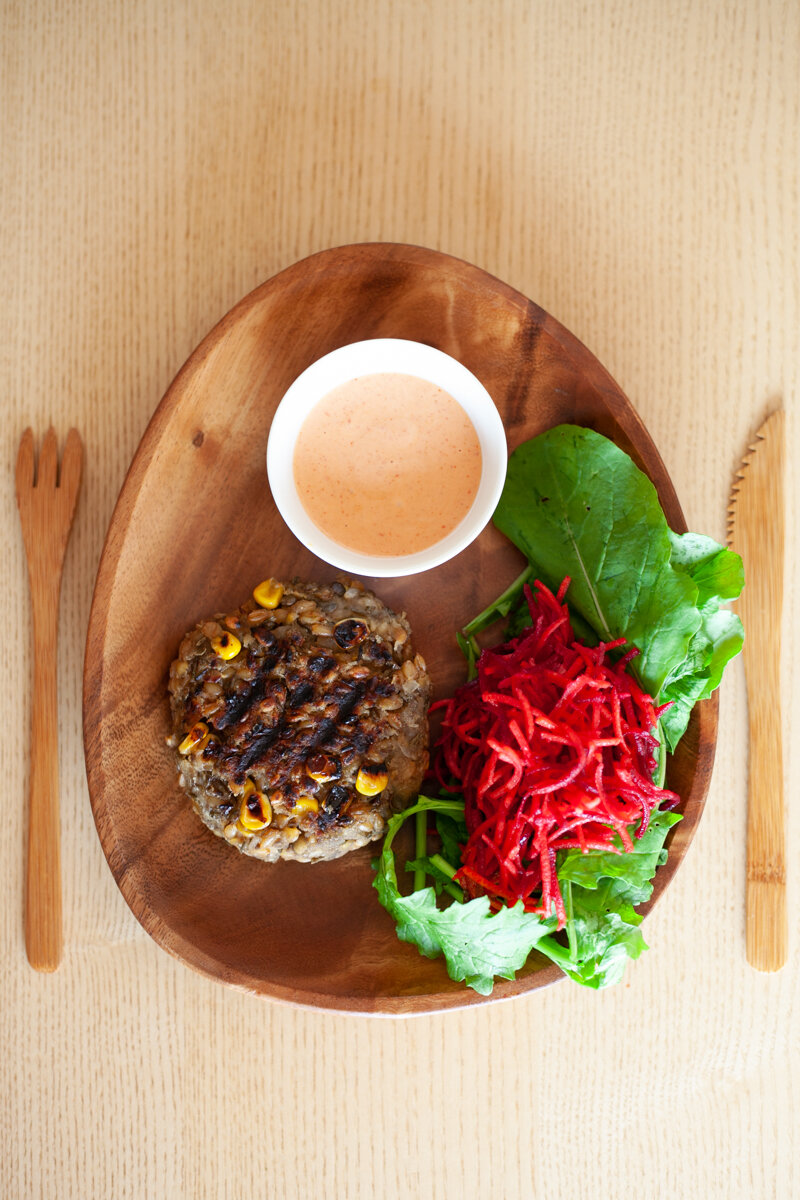
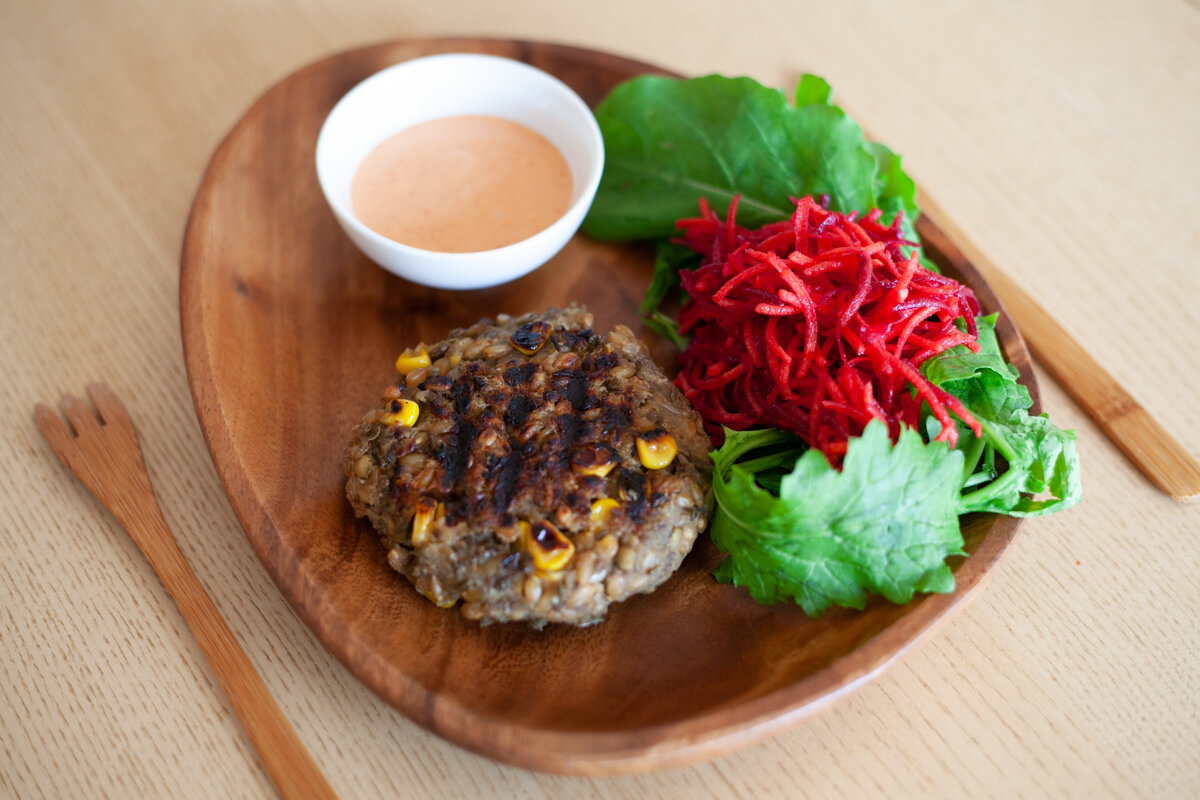
Lentil veggie burger topped with chedder cheese. Le Creuset grill is perfect for achieveing those charred grill marks.

Lentil veggie burger topped with chedder cheese. Le Creuset grill is perfect for achieveing those charred grill marks.

And the sauce, don’t forget the sauce that goes with! Choose your own but this sriracha mayo one just really does it for me.

Lentil Veggie Burger

INGREDIENTS//Yields 8 medium size patties

• 500 grams lentils, cooked
• 1 cup of spelt grain
• 1 medium onion, diced and sautéed
• 150 grams corn, tinned
• 1 tablespoon Worcestershire sauce
• 1 teaspoon cumin powder
• 1/2 teaspoon chili powder
• 1/2 teaspoon paprika
• 80 grams of sunflower seed
• 1 tablespoon chia seed (optional)
• 150 grams panko, (Japanese bread crumb)

PREPARATION

Cook your cup of spelt grains like you would do with rice. Start with equal parts water and grain ( Add about a quarter cup more or water).

SAUCE

Sriracha Mayonnaise // Yields 1 cup

Mix one cup of mayonnaise with a tablespoon of sriracha sauce.
Grate a half clove of garlic (if no garlic is in your mayonnaise recipe) and squeeze some lemon juice or orange juice (anything citrusy and sweet)
Salt accordingly.


INSTRUCTIONS

Mash the lentils with the back of a fork in a large mixing bowl until you get a chunky purée.

Add the next 9 ingredients and stir: spelt grain, onion, corn, Worcestershire sauce, cumin, chili powder, paprika, sunflower seeds and chia seeds.

Finally, add the panko breadcrumbs to combine with the rest of the ingredients before starting to form your patties.

You can form eight medium size patties with your hand.

Heat up your grill (I use a a Le Creuset grill pan) and cook each side for approximately six minutes and when you see char marks.

NOTE

If you are using lentils or other beans from tins be sure to drain all the liquid out. Same for the corn. We want to make sure the patties are not too wet.

Chia seeds are optional but does help keep the patty together as it acts as a binder but I don’t mix it with water to get its gelatinous texture. I throw the seeds in direct as it will absorb any liquid from the lentils. The spelt grain, sunflower and chia seeds all add texture to the patty.

Dim Sum Turnip Cakes

Luo bo gao (蘿蔔糕)served with a savory hot sauce.

Luo bo gao (蘿蔔糕)served with a savory hot sauce.

Luo bo gao is a dim sum staple.

Luo bo gao is a dim sum staple.

Do you remember those bountiful green turnip tops I was boasting about the other day? Yep, it fed me well and it’s an easy-peasy, nourishing, clean feeling green soup to make. Well, I got stuck with the turnips after that. Turnips have turned up in my AMAP basket in the past two weeks. Their tops get eaten rather quickly but what to do about the bulbs? I enjoy the occasional raw turnip grated into my salad, especially when I mix it up with grated carrots and beets. I tend to keep this grated mix on hand in a jar to top off my salads whenever I find turnips in my weekly basket. That takes about one or two turnips but what about the rest?

Roasting is another way to go. I try to conceal them in with the potatoes and other vegetables but I find my kids ignoring them and casting them off to the side for me to pick up and eat, which I do,— with a smile— to show them that they are just as good as the others. Really though, deep down inside I do prefer the other veggies.

As I stared at all the beautful white and purplish turnip bulbs on my kitchen table I had to find another solution for them. That’s part of the fun when receiving locally grown seasonal vegetables. We’re not meant to love them all but finding a way for them to be liked and acceptable at the table is a position I take pride in. I hate leaving other veggies behind and I think of my kitchen as a lab experimenting, incorporating and introducing new and old flavors with their individual characteristics and playing with texture to give it a makeover. Then, we can give it another chance. This is my No Vegetables Left Behind Act.

My white purplish turnips (western turnips) are not the typical turnips that one would use to make the traditional Chinese turnip cake, lo bo gao (蘿蔔糕). Usually it’s a daikon, a Japanese radish which is long and white. Lo bo gao is a dim sum dish that is always ordered as a part of my family’s menu at brunch. I am missing my NYC Jing Fong days. Jin Fong is a must on the list of eats in NYC. It’s a gastronomical and visual experience and you feel like you’ve been transported to Hong Kong. You can get your traditional dim sum there along side with 800 other people sitting around sharing round tables. I really hope it will survive this horrible coronavirus period, sigh.

Returning to all those turnips staring back at me, I had the perfect opportunity to recreate this dish and to use up all my turnips. Here I stood cooking and reminiscing about the many brunches at Jin Fong with friends and family from the past and daydreaming hopefully to bring new friends and family to share in this tradition.

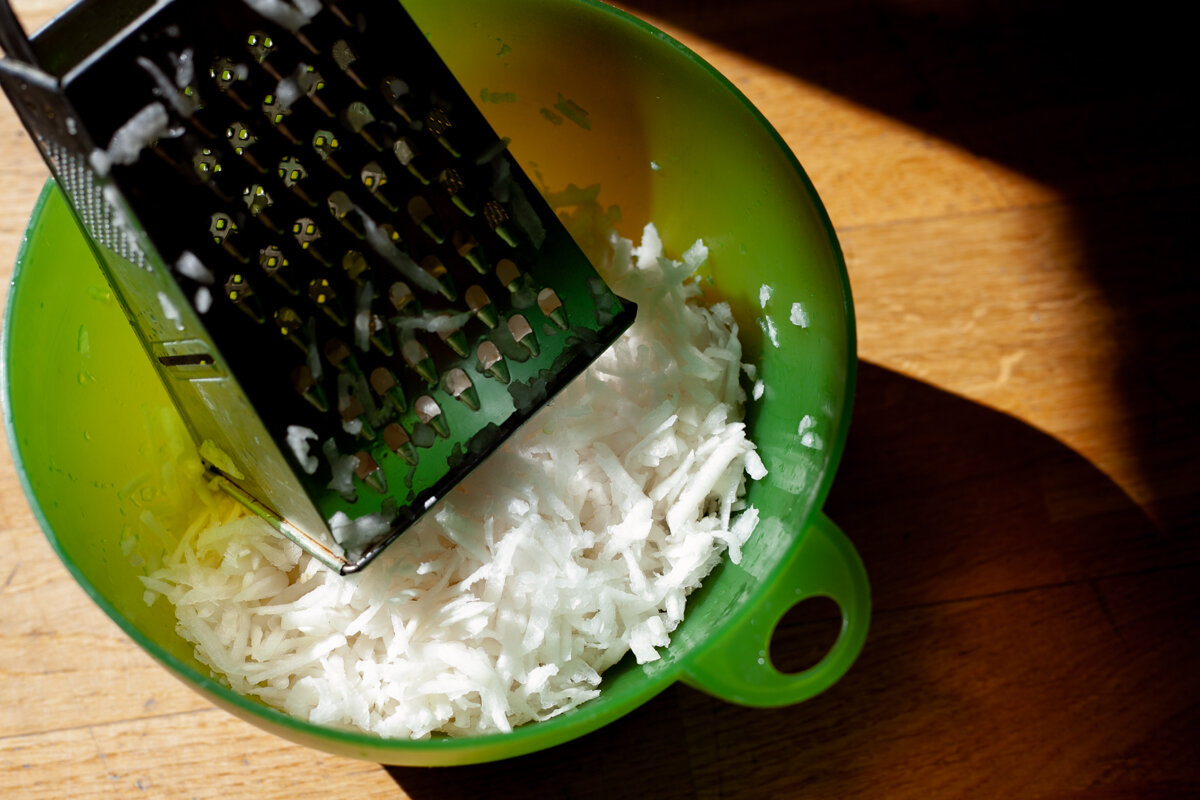
Grated turnips.

Grated turnips.

Simmer unitl softened.

Simmer unitl softened.

Rice flour and corn starch mix.

Rice flour and corn starch mix.

Combination of turnips, rice flour/corn starch mix, shitake mushrooms/onions toppings.

Combination of turnips, rice flour/corn starch mix, shitake mushrooms/onions toppings.

Batter poured into a mold ready to steam.

Batter poured into a mold ready to steam.

Luo bo gao steaming inside wok for approximately 45 minutes.

Luo bo gao steaming inside wok for approximately 45 minutes.

Let it cool after steaming and then slice into small rectangular or square pieces and pan fry each side until golden. You can actually eat it steamed and opt out of the pan fry option but most people prefer the pan fried turnip cakes.

Let it cool after steaming and then slice into small rectangular or square pieces and pan fry each side until golden.
You can actually eat it steamed and opt out of the pan fry option but most people prefer the pan fried turnip cakes.

Turnip Cakes

PREPARATION

Rehydrate the shitake mushrooms by soaking the dry mushrooms in tepid water until it softens.

INGREDIENTS//Yields 8 rectangular pieces and a couple of odd ones

• 500 grams turnip, freshly grated
• 1 1/2 cup water
• 140 grams rice flour
• 1 tablespoon corn starch
• 3 dry shitake mushrooms, rehydrated (see NOTE below for other common traditional options)
• 1 small onion, diced
• 1/2 teaspoon salt
• white pepper, adjust accordingly

INSTRUCTIONS

In a large pot add your grated turnips and a cup and a half of water and bring it to a boil. Then lower the heat and let it simmer unitl the turnips soften. About 10 minutes after boiling point.

Drain the turnips and keep the liquid. It should give you a 1 1/3 cup of water. If not, just add more water to it to make up the difference.

In a skillet, sauté your mushrooms and onions (or other dry ingredients, NOTE below) together. Set it aside once cooked.

Prepare another mixing bowl for the rice and corn starch. Add the salt and white pepper to this dry mix.

Then use the drained liquid from the turnips and mix it in with the dry ingredients.

Add the turnips and stir, following with the sautéd mushrooms and onions.

This will produce a wet paste-like batter.

Set up a steamer and bring the water to a boil.

Using a mold that fits into a steamer (I had a 9-inch round cake pan I used for my mold but you can use a rectangular or square mold that fits in a steamer).

Be sure to oil it all over and then pour the batter in. With a back of a spoon spread it across the batter to smooth it out.

Steam the turnip cake for 40 minutes over high heat, replenishing the water in the pot as necessary.

Take a toothpick and poke through the cake to test if it comes out clean. If so, set it aside and let it cool.

After it has cooled down take a knife and slide it around in between the cake and the mold to loosen it.

Flip it over onto a cutting board using a spatula to help it out if necessary.

Cut it into rectangular or square shape pieces.

Add some oil to a cast iron skillet or a non-stick frying pan and fry each side until golden brown.

Serve with a dipping sauce (hot chili oil, soy sauce, bean sauce, oyster sauce ,chili garlic sauce, sriracha or a combination of any of those)

NOTE

In the last photo above you will see the steamed turnip cake out of its mold. In this particular cake I used Chinese sausages and shitake mushrooms. These are traditional fillings and I made that for my family who are omnivores. We generally use dried sausages, dried shrimps, or dried scallops (my fave) and dried mushrooms since they hold less water and add flavor. You could probably add pork bits for flavor and texture too. I made a second one that is vegetarian, only with mushrooms and onions as that’s what I had available.

I’ve only made this twice and both times I used different amounts of rice flour and water. I found, with less water and rice flour, the consistency of the turnip cake was less dense.

You can actually eat it steamed and opt out of the pan fry option but most people prefer the pan fried turnip cakes.

Days of Nothingness

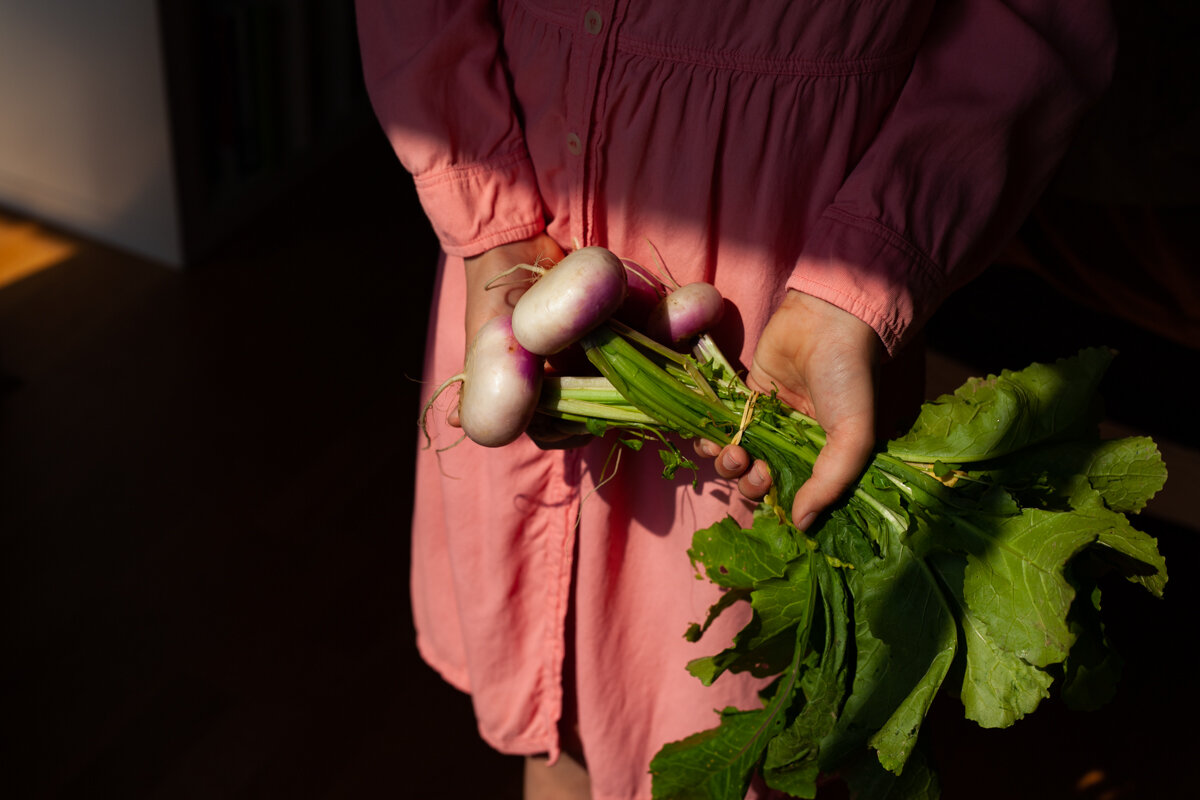
Seasonal turnip with its bountiful tops that gifted me a soup from it.

Seasonal turnip with its bountiful tops that gifted me a soup from it.

Within this time of confinement winter has rolled into spring, the bare branches that once stood before our balcony is now full of green leaves, and the immersive punctual 8 p.m. corona symphony of clapping and tapping pots and pans bring us out onto the balcony where daylight savings time has us springing ahead unveiling the dark curtains of winter to greet our neighbors hanging out by their window or standing on their balcony a block away waving at anyone who will wave back.

My kids have just entered their second week of Easter break and if you were to look up the term couch potato in the dictionary I’m pretty sure you would find a picture of them in there. Normally, I would be aghast but due to the circumstances I now wish I had a bigger couch.

The time we are often chasing down throughout the school year has surrendered to us and it seems to say “go ahead, what are you going to do to me?”

So I switched out the “optimize your time” parardigm of thinking to embrace “nothingness” and to celebrate simplicity. I like to think of it as an experiment. It may be considered something along the lines of mental cleansing, pressing the “off” button, or whatever you like.

With no warning I handed over the parental reigns to my husband to see if he’d pick them up. He did. You can call this bad faith on my part but I prefer to see it as authenticism. Before he picked up those reigns I found half my day was spent negotiating screen time with my childen on limiting or eliminating it from their schedule and then patrolling the apartment throughout the day to keep them off the screens as much as possible. Once the reigns were in hubby’s hands it was a mental unload even when I found the children on the screen longer than usual it somehow didn’t affect me. That pretty much freed up a whole lot of time to devote to nothingness.

Next, cooking when I feel like it and only out of necessity such as times when my stomach actually starts to growl—and not the way the French do it (like clockwork) nor when my family starts sniffing around in search for something to eat—turned out to be an eye opener. I would act upon my hunger calls and not anyone else’s. Try putting that into practice. It’s a tough conundrum for mums.

Since we aren’t supposed to be going out shopping for daily groceries during the confinement period we keep a small supply of dried and frozen goods. Pasta and burger patties are the easy go-to dishes that my husband and kids can make and seem to profess their love to so why not let them have their affair and eat their heart out? When their hunger calls they can answer for themselves. My time spent preparing, cooking, and educating them towards eating a balanced meal was now next to nil since I didn’t spend time over conscious choices. I call this letting go.

Velouté de fanes de navets just sounds fancier than turnip top soup.

Velouté de fanes de navets just sounds fancier than turnip top soup.

With my bountiful turnip tops and swiss chard leaves all I could envison for it was a soup. Batches of it. This is all keeping in line with celebrating simplicty. I also found a bag of dried mung beans in the pantry and turned that into soup too, a Chinese dessert soup called Lu Dou Tang (綠豆湯) literally translated into “green bean soup “ in which you can add yams to. This is a classic Chinese soup that has cooling benefits so it is prepared mostly during the hot weathered months. When temperatures soar, tempers rise. Who knows, this may be beneficial in the process of keeping my cool and would sustain me for days too. With my soups all jarred up and ready to be reheated at my hunger’s beck and call I was free to devote myself to nothingness.

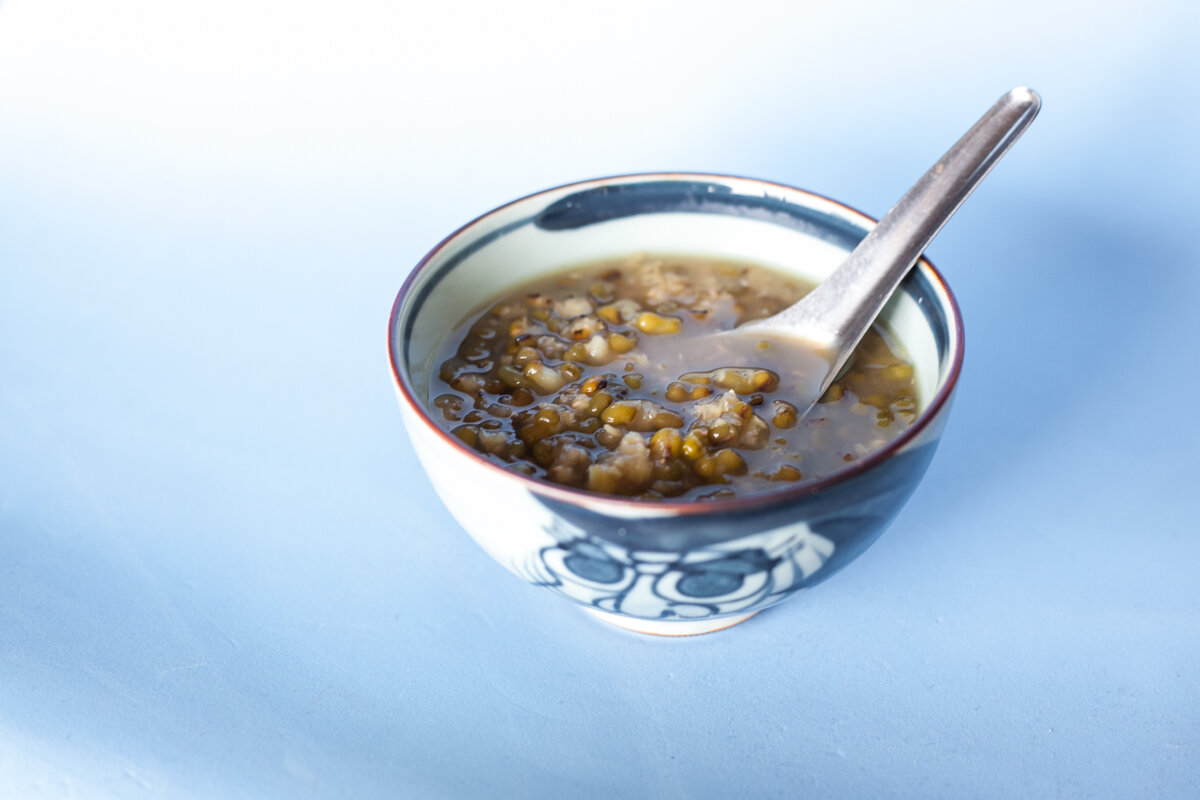
Chinese Lu Dou Tang (綠豆湯) soup with cooling benefits.

Chinese Lu Dou Tang (綠豆湯) soup with cooling benefits.

Lunch these days is starting to push back to 2:30 p.m. and dinner is closer to 9:00 p.m. On this particular Saturday this meant I could have a lie-in, go for a run, be back for a shower, take my time to head back out to pick up my AMAP (you can see a picture of where I collect my veggies every Saturday) vegetables, and not have to rush back to get a meal on the table. AMAP is a French equivalent of a commmunity supported agriculture (CSA).

This blows away the Saturdays from the last years when wake up call was at 8:15 a.m. and by 8:45 a.m. I was out the door accompanying my son to his tennis lesson, having a run along the canal during his lesson, picking up my AMAP veggies on the way home, washing the soil off the vegetables, preparing lunch, jumping into the shower, eating lunch together, cleaning up, and then back out again for Chinese classes that started at 1:30 p.m. and finished at 5 p.m. with my time alternating between both kids for that special one on one time while the other was in class. Don’t get me wrong, I love my one on one time with my children but the routine of it all—well, ya know. I think I can embrace nothingness pretty well.

Days of solace could be found by a trip to the sea and traveling wherever you wanted as long as it took you away. We could meet up with friends where support and cheer could be found. That’s all temporarily on hold. Now we must ease our minds within our isolated worlds.

I wake up earlier than usual these days. Eating less, running, and detaching myself from my smartphone has helped in my devotion to nothingness. I wake up clear-headed and light weighted sometimes with feelings of anxiety, anger, giddiness, calm, clarity, happiness, confusion. Basically it’s a mixed bag. I then quietly sit in a room to myself in half lotus position and wait for the light of dawn to shine upon me as I awaken to the day that lies before me ready to accept nothing as it is.

I leave you with this mantra by TIna Turner…


Chawanmushi- Steamed Egg in Teacups

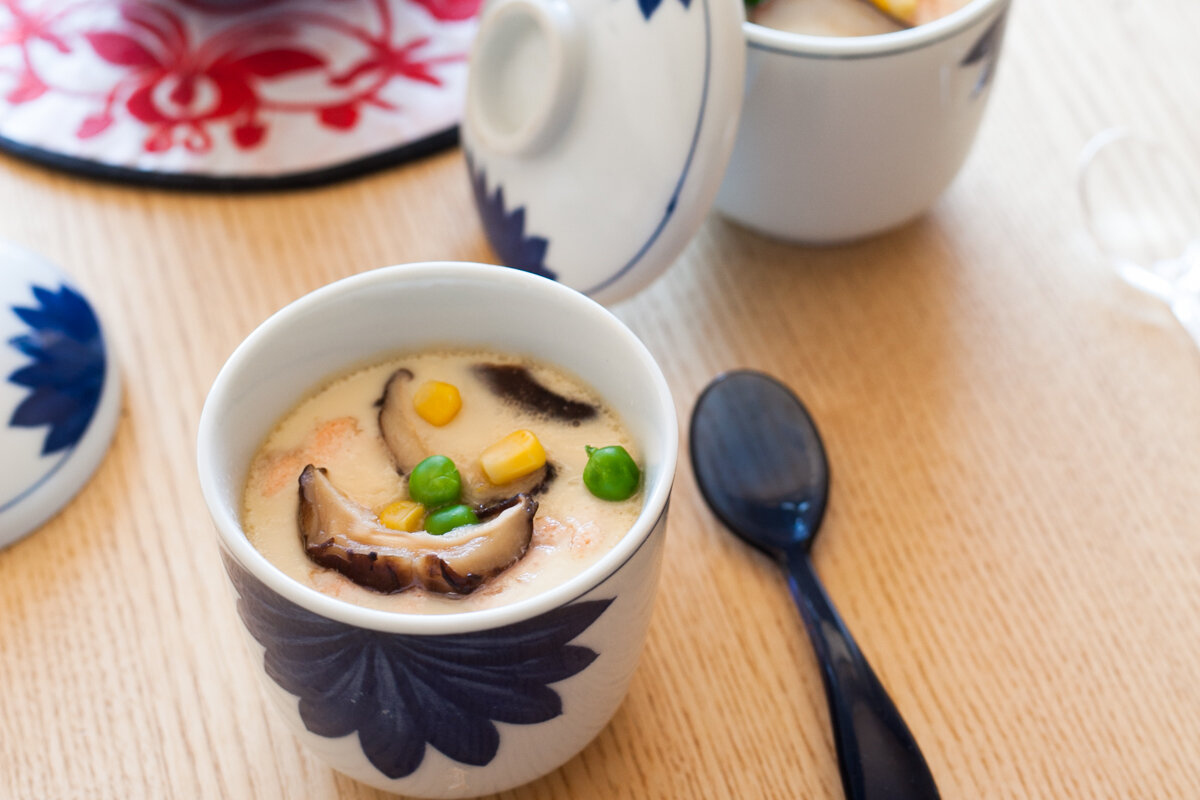
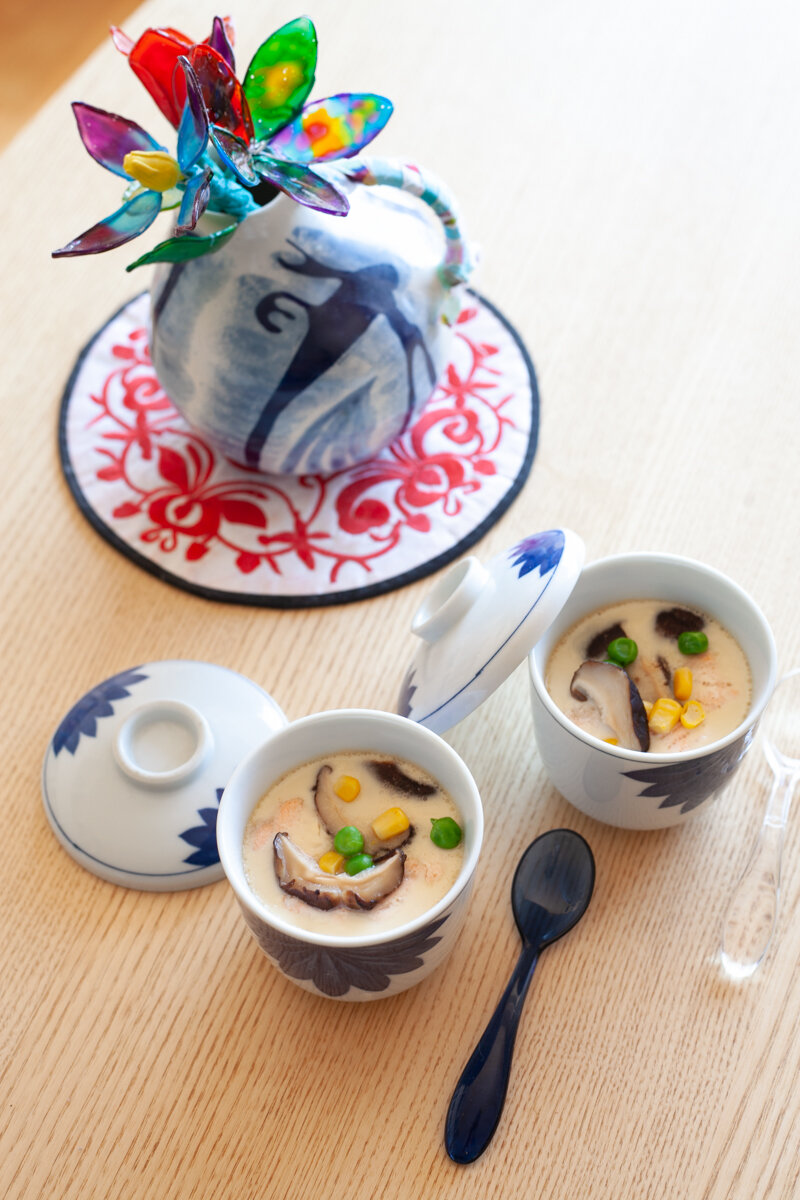
Steamed Egg that is silky and smooth with a hint of umami flavor served in chawanmushi cups.

Steamed Egg that is silky and smooth with a hint of umami flavor served in chawanmushi cups.

I came back from visitng my folks in Taiwan a few months ago with these chawanmushi cups securely wrapped in my carry-on. I was bringing back to France a piece of my childhood. These cups are just about as old as I am and that’s counting at least a few decades old.

Chawanmushi iliterally translated from Japanese is comprised of two words: teacup and steam. These cups are specifically used for this Japanese delicacy. It holds a celestial silky, steamed dashi egg mixutre that is just a palate pleaser for those who like a hint of umami in their lives.

I grew up with these ceramic cups.

I grew up with these ceramic cups.

My mum’s daily cooking duties were relinquished once retirement arrived but her cooking activies had already been reduced once my sister and I moved away from home. Those empty stomachs she once fed are now living abroad and salivating in retrospect of her cooking. I’m happy to see retirement suits her well and she’s happy to pass on remnants of her ceramics collection to anyone who will use them.

These are days of confinement as France goes into its eleventh day of lockdown. I am back to making meals 2-3 times a day and find myself bouncing between concocting a quick fix from the fridge or really taking my time to make something with meaning. So this is one of those meaningful recipes, to me at least.

Steamed Egg that is silky and smooth with a hint of umami flavor.

Steamed Egg that is silky and smooth with a hint of umami flavor.

Mum used to make chawanmushi for breakfast, sometimes a much simpler version without all the optional fillings I listed in the recipe. When I reflect back to my childhood I think about all the love that went into those meals, the fragrant aroma of what’s cooking, and the morning hours she had to rise to in order to get those power meals on the table for us to start our day right, I find myself doing the same now but on a subpar level. Meals were not just deliciously served but aesthetically presented.

I don’t own all the pretty dishes like we had when growing up, especially dishware meant specifically to serve or to cook just one thing. If this seems like a frivolous purchase to you buying a set of chawanmushi cups for something you’ll make or try to make once a year you can certainly use ramekins or any heatproof tea cups you have in the house.

Owning these cups gave me the incentive to make this appetizing side dish and it brought me gratification to see my kids and husband tasting it out of the same chawanmushi cups I ate out of while growing up with my parents.

Chawanmushi

INGREDIENTS//Yields 4 servings

• 3 eggs
• 300 ml dashi
• 1 teasppon soy sauce
• 1 teaspoon mirin
• 1/2 teaspoon salt

PREPARATION

Rehydrate the shitake mushrooms if you are using dried ones.
Soak the konbu for the dashi stock. Pre-cook, steam or blanch certain vegetable fillings that take longer to cook such as carrots, edamame beans, gingko nuts.


Fillings

• 80 grams of seafood, or poultry, cut up in small pieces (scallops and salmon work well)
• 20 edamame beans or peas
• 2 shitake mushrooms
• 2 tablespoon corn kernels
• Sliced carrots, gingko beans, and naruto (fishcakes) are used as tradtional garnishes.


INSTRUCTIONS

Crack the eggs into a mixing bowl and whisk it by hand. Then whisk in the dashi stock, soy sauce and mirin.

Be careful not to overbeat it.

Take a sieve and strain the mixture into a bowl or large measuring cup.

Divide your choice of fillings and place them into the bottom of the teacup.

Pour the mixture into the 4 cups equally.

Cover each cup with aluminum foil.

If you don’t have a steamer, in a large pot (enough to hold and cover your teacups) place the bottom of a bamboo steamer or a metal steamer rack inside and add an inch and a half of water. Bring it to a boil on high heat.

Then carefully place your heatproof cups into the pot and steam for 8-10 minutes.

At this point carefully take out the cups (be careful, it’s hot! I wear kitchen mittens), uncover them, and add your garnishes so that they float at the top ( I added more corn kernals and mushroom slices in the photos shown) .

Recover the cups with the aluminum, reduce the heat, put the cups back into the steamer and continue to steam for another 15 minutes (approximately 25 minnutes altogether).

Take your cooked chawanmushi out of the steamer carefully and cover with the individual lids to set or just keep the aluminum on for another couple of minutes.

If you have the chawanmuwhi cups serve it with the lid so that the individual can uncover their heavenly surprise.


NOTE

If using edamame, peas, and carrots as choices for your vegetable filling I like to pre-steam them beforehand halfway into fully cooking through. Then, take them out and put it on the side until you add them into the recipe.

You can use ramakins if you don’t have teacups.

Lost in the time of corona, Pain Perdu—Lost Bread.

Pain Perdue-6519.jpg

We are experiencing a historic time in our lives. France has banned all social gatherings and closed its borders. Other countries are following suit. We are living in confinement, practicing social distancing while fighting this war together against the coronavirus. It’s a testing time for us city dwellers who share smaller spaces and don’t have the luxury of a balcony, garden, or rooftop to just step out and take in the fresh air and stillness of the city.

Sounds of sirens are no longer screaming. I guess the cops, firefighters, and other emergency vehicles have the streets to themselves. I wonder if crime has gone down too?

Pain Perdue-6452.jpg

We now need to fill in permission forms to exit our homes and it must be for an acceptable reason on the list issued by the French government. Fortunately, exercising outdoors in close proximity to where one lives is still acceptable as long as you do it on your own. For me, this is running around my block like thirty times and it has become an everyday affair since life on lockdown.

Pain perdu literally means “lost bread”. Traditionally it’s leftover stale bread reconverted into a sweet deliciousness by coating and soaking it in milk, egg and sugar. This traditional recipe dates as far back to the ancient Roman times.

The French do not like to waste food and tossing bread probabably has religious connotations and may be frowned upon, especially in economic dire times…this is a triple whammy. We are facing those economic dire times NOW. So what best to do with any leftover baguette, brioche, and Wonder bread—does that even still exist?!

Pain Perdu

INGREDIENTS//Yields 8-12 slices

• 60-80 grans butter
• 200 ml milk
• 2 large free-range egg
• 1 tablespoon sugar
• 1 teaspoon cinnamon powder
• Bread of your choice (my faves: brioche, baguette,challah—preferably older bread), sliced

Toppings

• 1 tablespoons confectionary sugar
• Maple syrup as desired
• Fresh fruit

INSTRUCTIONS

In a medium size mixing bowl beat the eggs, milk, sugar, and cinnamon. Set it aside.

Heat up your skillet with your knob of butter.

Begin by dipping a slice of bread into your wet mixture and let it soak from both sides.

Transfer it to the hot skillet and cook until each side is golden brown.

Assemble it on a plate with your favorite toppings.

Radish Top Soup—More Bang for the Buck.

Radish Top Soup-2126.jpg

One Saturday, I came home with my AMAP goodies which included radishes and their very green leafy tops. I was supposed to have 240 grams worth of radishes and I felt slightly cheated when I saw that the greens took up so much volume and added weight until I bumped into my neighbor and fellow amapien friend who must have seen the slightly disgruntled face I must have pulled while weeding through the crate of radish…

Je fais une bonne soupe avec les fanes de radis, said Marcel.

C’est vrai? Dites-moi …I quipped.

Radish Top Soup-2195.jpg

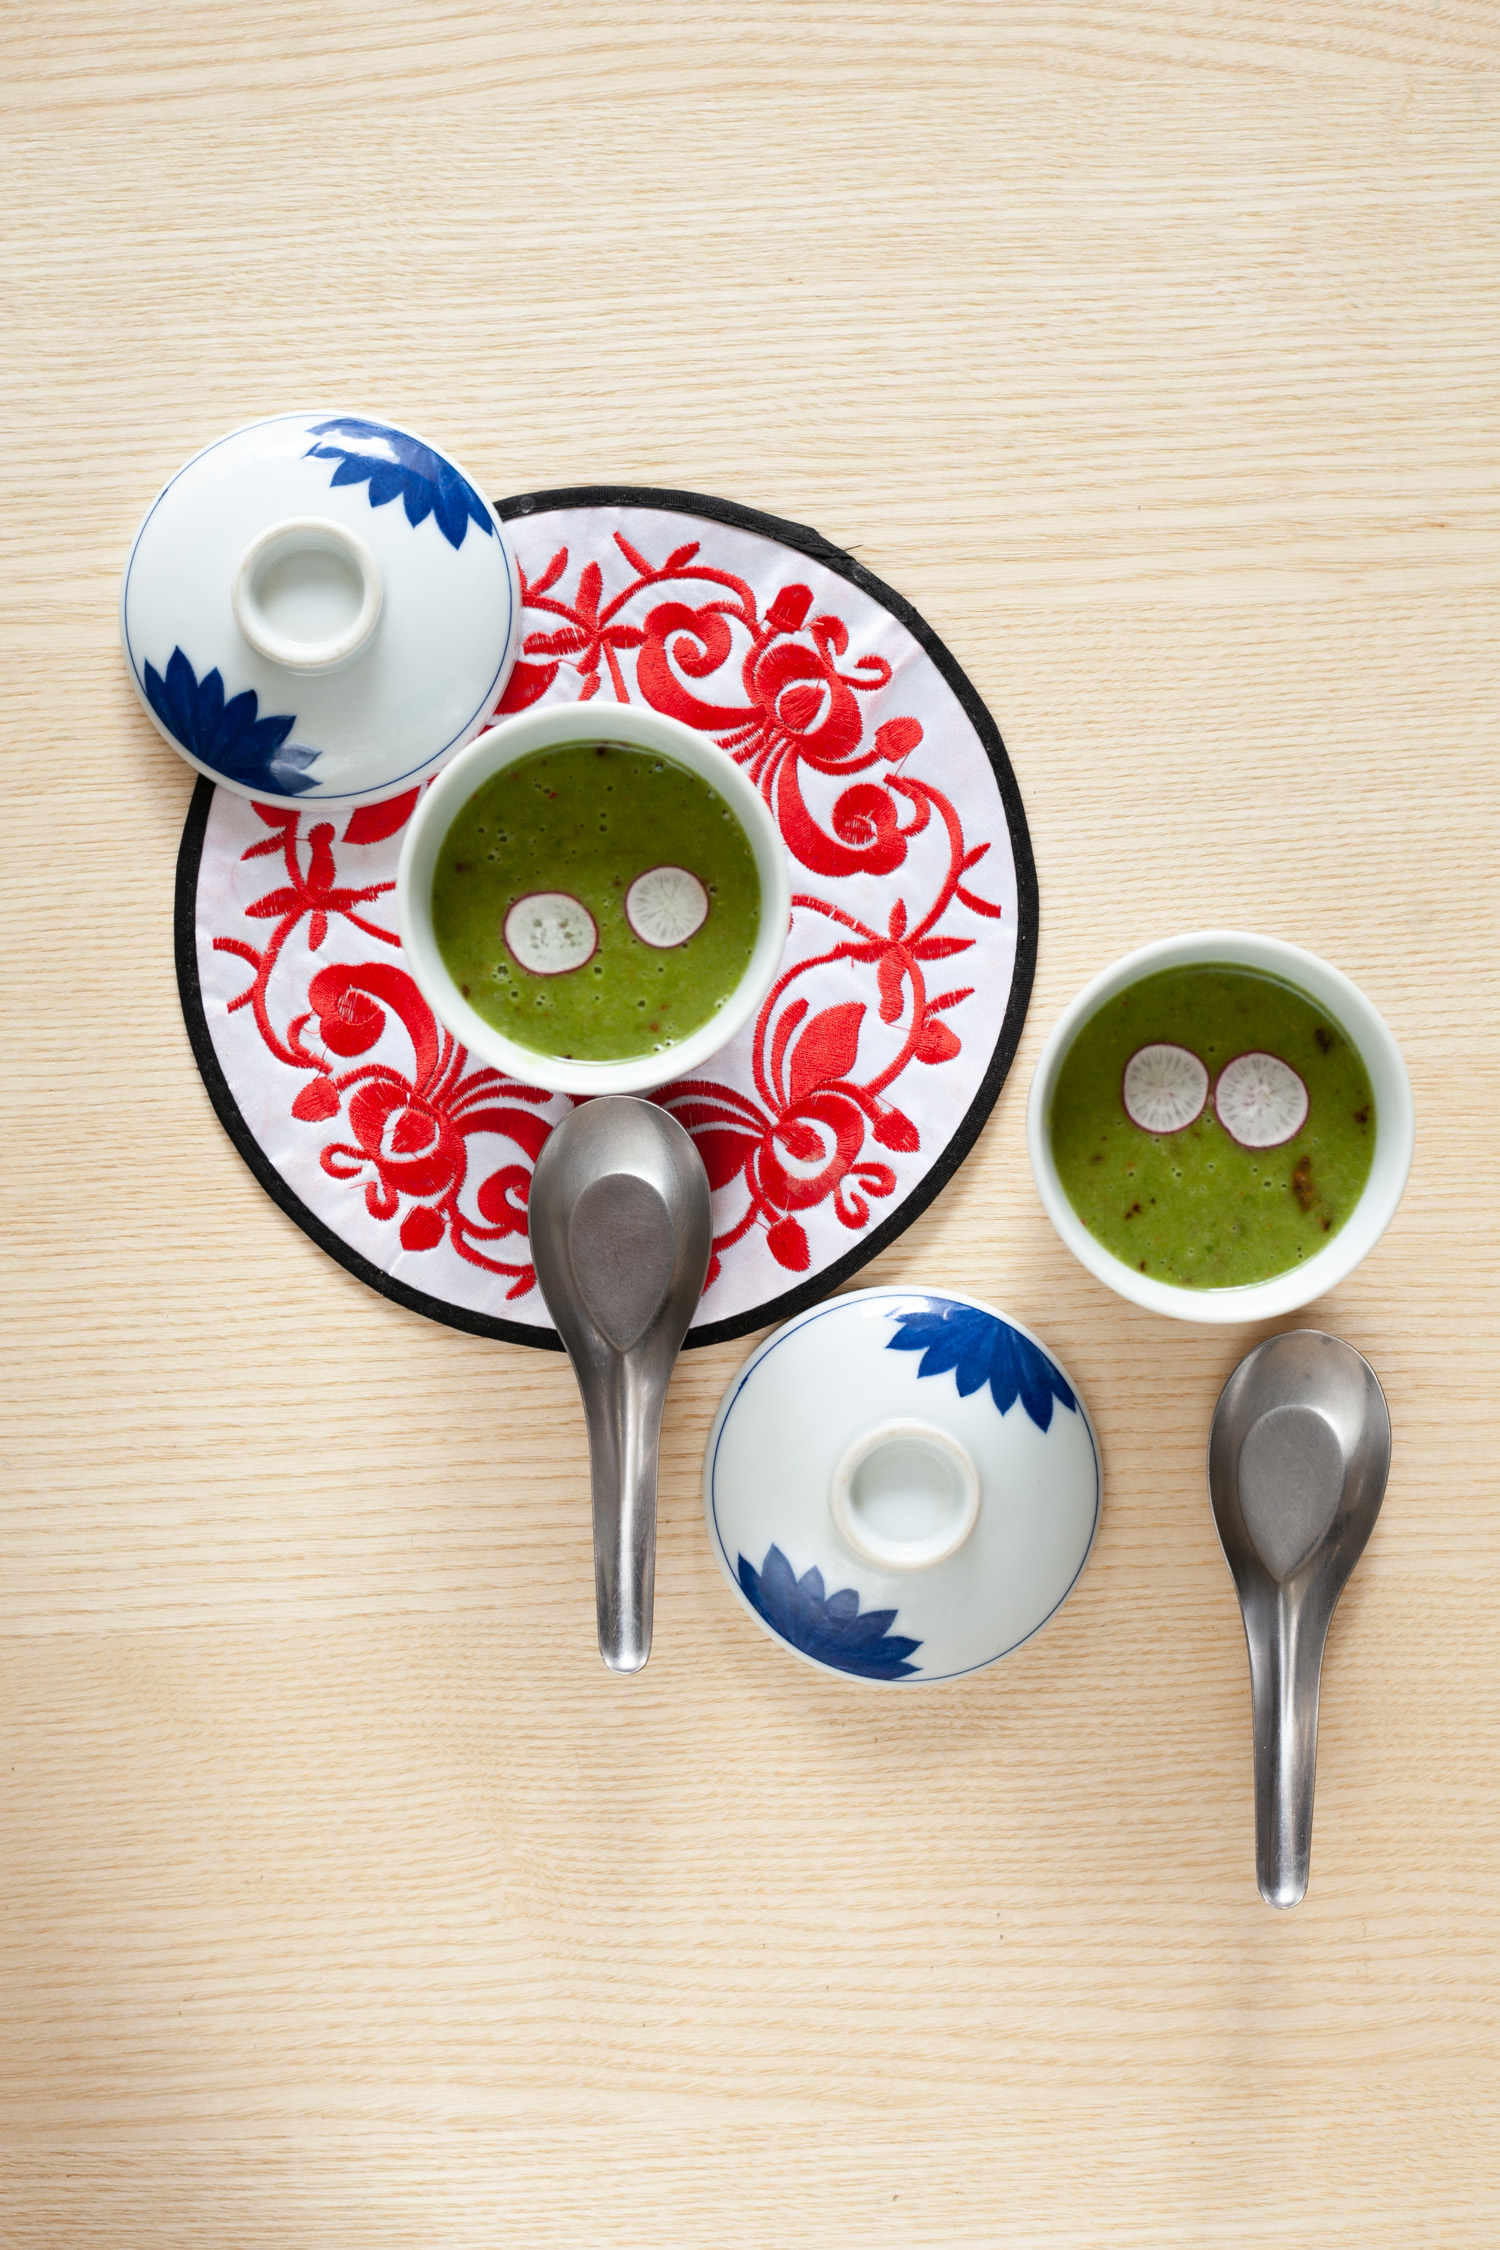
Radish leaves have an earthy and peppery taste. If you like watercress soup, you’ll love this. The recipe is so simple and quick to make and it’s delish. It’s a healthy green soup that just keeps you feeling clean and good.

Apparently it is full of vitamin C, more per serving than in the radish itself and a high concentration of vitamin B6, magnesium, phosporus, iron, calcium, and vitamin A.

So next time you buy radishes from the market don’t get rid of your radish tops. You’ll get more value and get a meal out of it!

I didn’t pull a face last Saturday when I got radishes on my list again.

Radish Top Soup

INGREDIENTS//Serves 2-3

• 1 medium yellow onion, diced
• 1 medium potato, diced
• 1 bunch fresh radish leaves, chopped
• 1 litre water
• Salt, adjust accordingly
• Chili pepper, adjust accordingly
• crème frîache, dallop (optional)

INSTRUCTIONS

RInse the radish leaves and leave aside until needed.

In a medium size pot, add about a tablespoon of olive oil and cook up the onions.

Add a litre of water and the potatoes to the pot and bring it to a boil.

Once it hits boiling point bring the heat down to a simmer. Add your salt.

When the potatoes are cooked through add the radish greens and let it cook for about 5 minutes.

Adjust with chili pepper powder and more salt if necessary.

Let it cool and whizz it up in a blender.

NOTE
Re-heat the soup before serving after it is all blended together. You can add a dallop of crème fraîche to the soup for a creamier texture and perhaps a more balanced taste but personally I find the starchiness of the potato makes it creamy enough.

Try using turnip tops for this soup too!

Tuna and Egg Filled Bricks—A Mahgrebian Classic Snack

Brik-0679.jpg

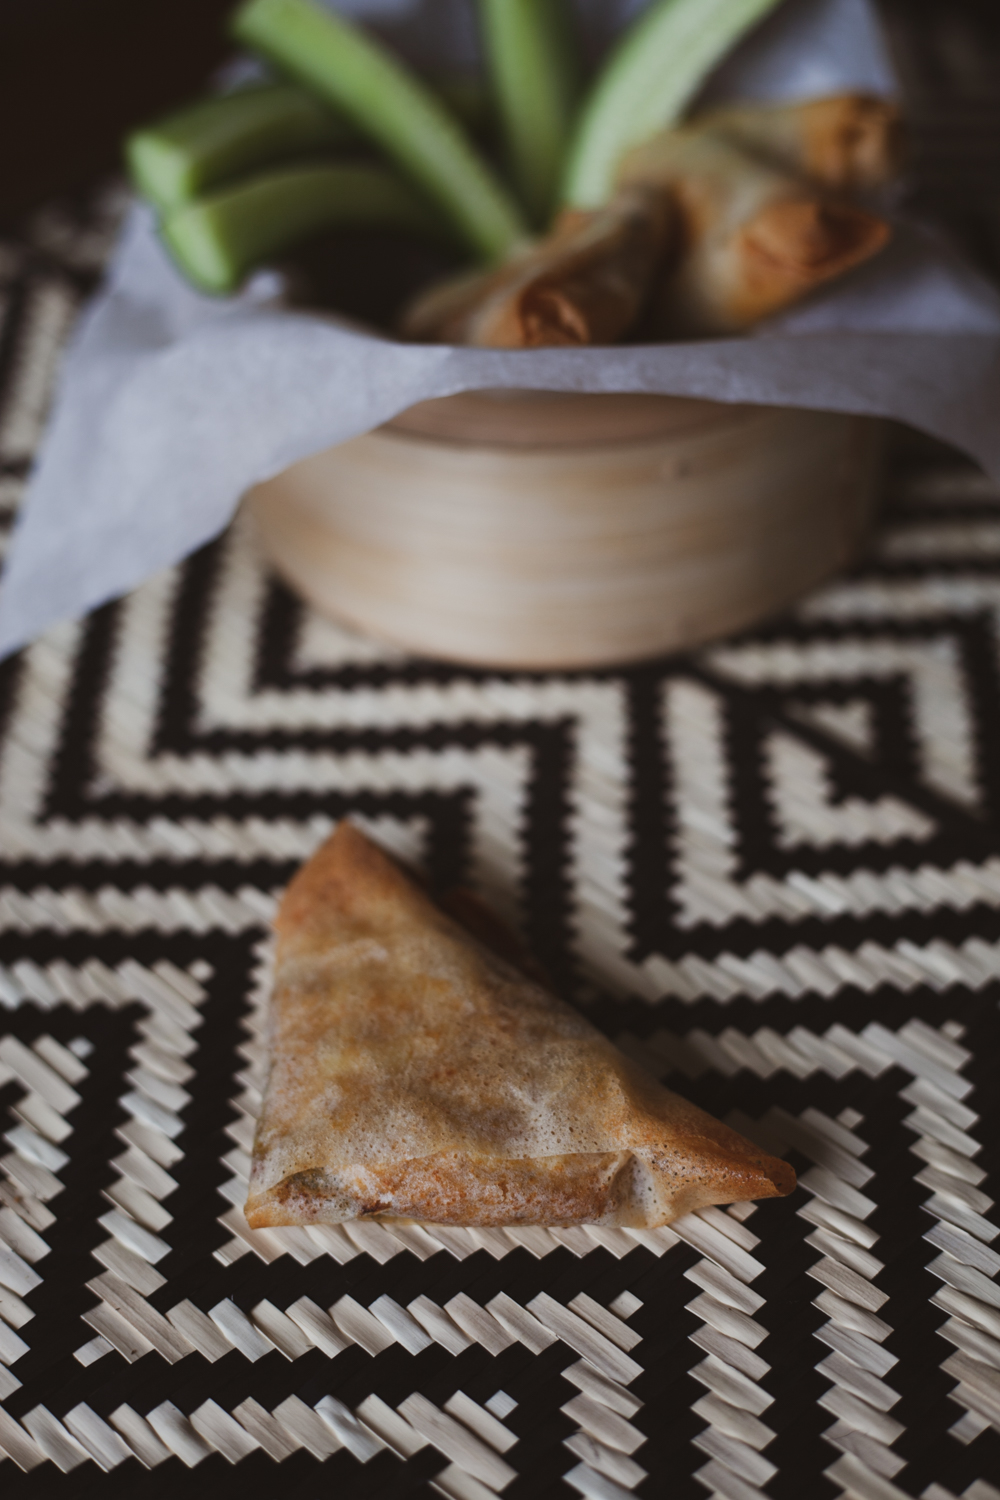
Brick, brik, bourek—you’ll see them with these various spellings on most menus serving Moroccan, Tunisian, and Algerian cuisine and they are a classic snack in any Mahgrebian household.

My “belle” belle-mère (my “beautiful mother-in-law”) as I like to call her made this for me years ago for the first time. I was curious about what was found and sold in these greenish plastic wrapped bags for I had seen them in the local supermarkets but I never knew what was inside the packaging. The minute she plopped the bag down on my table top from her grocery shopping I asked her what was in it and she said “c’est un vrai délice, tu vas voir.” This usually means I get to sit back and to be fed something I’ve never had which will be really delicious!

Brik-0689.jpg

So I finally discoverd the brick sheets that were hidden inside the packaging and all the various fillings that would be wrapped in them.

In the same vein as a potsticker, samosa, and egg rolls there are so many different fillings (meat, poultry, cheese, vegetables, etc) to be had in this classic snack. So if you can get your hands on some brick sheets you can have a lot of fun making your own fillings and creating your own concoctions with various spices.

Personally I prefer to bake mine but I believe traditionally it is pan-fried.

Tuna Filled Bricks—A Mahgrebian Classic

INGREDIENTS//Yields 20

• 10 sheets brique sheets
• 1 tin tuna (140 grams), drained
• 2 eggs, hard boiled and diced
• 1 medium size potato, boiled and cut into small chunks
• 1 small onion, diced and sautéed
• 50 grams green olives, pitted and sliced
• 1 tablespoon lemon juice
• 1 teaspoon of spice ( ex: harissa, chili pepper powder, paprika, or cumin)
• 2-3 sprigs of flat parsley, chopped finely
• Salt and pepper, adjust accordingly
• 2 tablespoon olive oil or vegetable oil

Instructions

Filling

In a medium size mixing bowl combine the tuna, eggs, potato, onions, green olives and mix well.
Then stir in the lemon juice, harissa, and the parsley.

On flat working surface, lay your brick sheet flat in front of you. Cut it n half. They are usually round so you will end up with half a circle laid out in front of you.
With the straight edge topside fold up the bottom round bit so that the edge comes near the top of the straight edge. Press down to flatten.

Start at the far left end of the brick sheet and place about a tablespoon of filling, then take the top corner of the sheet and fold it down to meet the opposite end of the bottom edge to form a triangle.

Pat the filling in place. Then take the left bottom corner and fold it directly over along the bottom straight edge. Continue to fold following the shape of the triangle. Towards the end tuck in the end of the brick sheet between the folds.

Two ways to cook:

Bake

Pre heat your oven to 200° C or 390° F.

Line up your folded bricks on a baking tray and lightly brush some olive oil on each side.

Place it in the oven and bake it for 15 minutes or until golden brown.

Pan Fry

In a large skillet on medium-high heat up a tablespoon of vegetable oil.

Place the folded bricks in the skillet when the oil is hot. Pan fry each side until golden.

NOTE

There are other ways to fold and to present bricks. You can also add more filling and make a square shape brick. Using an entire sheet, add and flatten 2-3 tablespoons of the filling a third up from the bottom. Just bring the two ends (left and right side) of the brick sheet to meet in the middle and fold up from the bottom along the filling and repeat until you have a square. This presents nicely as a main meal with a salad on the side.

Spicy Rice Cakes, Korean Style Dukbokki

Tubular shaped rice cakes with fresh vegetables.

Tubular shaped rice cakes with fresh vegetables.

I've been gluten free for a few months now.  In the beginning it was just part of my detox, dry January phase but now it's become a habit.    I've naturally reverted back to eating Asian food, so these days it's been rice over pasta—although I did buy a pack of gluten free pasta from Barilla the other day and I was pleasantly surprised by it!

Being gluten free has taught me to distinguish between which ingredients contain gluten or not.  Avoiding gluten has been relatively simple for me as most of the gluten free grains and other starch containing foods make regular appearances in my diet anyhow with the likes of rice, quinoa, amaranth, and buckwheat.

I'm discovering more of my favorite foods that are gluten free with a wee bit of adjustments made to them such as in this Korean spicy rice cake dish, dukbokki.


Korean style dukbokki

Korean style dukbokki

At times I am stumped by a product that has gluten in it like the gochuchang sauce I had on hand.  The sauce is pretty much the star of this dish otherwise I would have turned it into a Chinese stir fry dish with some other replacement sauce.  Disappointed with a raging craving, it was determined that I had to make my own gochujang sauce.   With luck on my side and some research it turned out to be pretty easy for me to whip up a homemade version of the sauce and I was able to enjoy this dish without gluten. 

A lot of the ready-made Asian sauces contain gluten or MSG so I've been on the hunt down for MSG free and/or gluten free sauces in Paris—organic would be nice too.  Anything I have found comes from the U.S. and costs a pretty penny for delivery.  So if anyone has any leads in Paris, please do let me know...

Spicy Rice Cakes, Korean Style Dukbokki

INGREDIENTS//Serves 3-4

• 400 ml or 1.5 cups dashi, katsuobushi dashi, or water
• 500 grams rice cake
• 1 carrot, matchsticks
• 1 zucchini, matchsticks
• 150 grams cabbage, chopped
• 100 grams Shimeji mushrooms

Sauce:

2 tablespoons gochujang (fermented red pepper paste)
1.5 tablespoons brown sugar
1.5 tablespoon tamari sauce or soy sauce
1 tablespoon sesame oil
1 clove garlic, minced

INSTRUCTIONS

In a large pan, bring your dashi broth to boiling point.

Lower the heat to medium, add the sauce and stir until it all disolves into the broth.

While the broth is boiling, add the rice cakes and let it cook for about 5 minutes.

Continue to stir from time to time so that it doesn't stick to the bottom of the pan.

Then add all the vegetables: carrots, zucchini, cabbage, mushrooms.

Cover the pan with a lid and let it cook for an extra 5 minutes or until it has softened.  Remember to keep stirring the rice cakes from time to time.  The vegetables should be cooked through but still retain a bit of crunch.

Garnish with some scallion and serve while hot.


NOTE

I used the tubular shaped rice cakes from the refrigerated section of the Asian supermarket which took about 10-12 minutes cooking time.

Cooking time depends on the type of rice cakes you use.  They can be purchased fresh, refrigerated, or frozen and they come in tubular shapes and sliced disc shapes.


Tricolored Tian With Provençal Vegetables

Tricolored Tian-9809.jpg

Today is Fête des Voisins —just think block party!  It's an official date of celebrating and having a convivial moment with your neighbors.  It's B.Y.O.B. and potluck.  It was started up by a Parisian group of friends to strengthen neighborly relationships, to reinforce proximity, create solidarity amongst neighbors, and to mobilize them against loneliness and exclusion.

These people are still partying nineteen years later as an official association.  With funding and sponsorship they have been able to help neighbors in difficulty; festive Christmas parties are held for those who don't have family near them, assistance is offered to disabled or elderly people, day care may be available to parents in need.

It's quite an organized event and it's a nice reminder to us city folks that we do live in a community... and that it is actually nice to have a chat with your neighbors.  If no one is taking the initiative to throw a Fête des Voisins in your buidling just go to your local town hall and inquire about it.    The town hall in each arrondissement offers Fête des Voisins posters to display in your residence so that your neighbors can't say they forgot about it.  T-shirts are also given out to the organizers of the event.

We just have to keep our fingers crossed and hope that the rain stays out of the way.   Our building loves a party and we usually spill out onto the pathway way past our bedtime. 

Come on out now and show some neighborly love!
 

Tricolored Tian With Provençal Vegetables

INGREDIENTS//Serves 2-4

• 3 cloves garlic, minced
• 1 small onion, diced
• 1 eggplant, sliced into 1/4 inch rounds
• 1 zucchini, sliced into 1/4 inch rounds
• 2 tomatoes, sliced into 1/4 inch rounds
• 2 sprigs thyme
• black pepper and sea salt, adjust accordingly
• 3 tablespoons olive oil

PREPARATION

Choose the vegetables with approximately the same diameter in size.  Then wash and slice them into rounds.

INSTRUCTIONS

Preheat your oven to 220° Celsius (approx. 425°F).

In an earthenware dish or baking dish add your minced garlic and diced onion.  Mix it up with a splash of olive oil and place it in the oven for 8-10 minutes.  You'll see the garlic sizzling and the onion sweating.

Take it out of the oven and let it cool slightly, then alternately lay your vegetables following a pattern of an escargot shell.  Start from the edge of the baking dish and continue the pattern until you reach the center.  If you have a rectangular dish just line them up in rows.

Generously sprinkle your choice of herbs (I used thyme this time), some sea salt, and black pepper.

Drizzle olive oil all over the vegetables.

Place it in the oven to bake at 220° C for 30 minutes and then cover the vegetables with a sheet of aluminum and place it back in the oven to back for another 15 minutes at 175° C (350° F).  The vegetables should be slightly roasted on the outside and tender on the inside.

Let it cool and serve at room temperature.


NOTE

The amount of vegetables I used above fit a 7 inch round (17.5 cm) earthenware dish.

Rainbow Fresh Spring Rolls

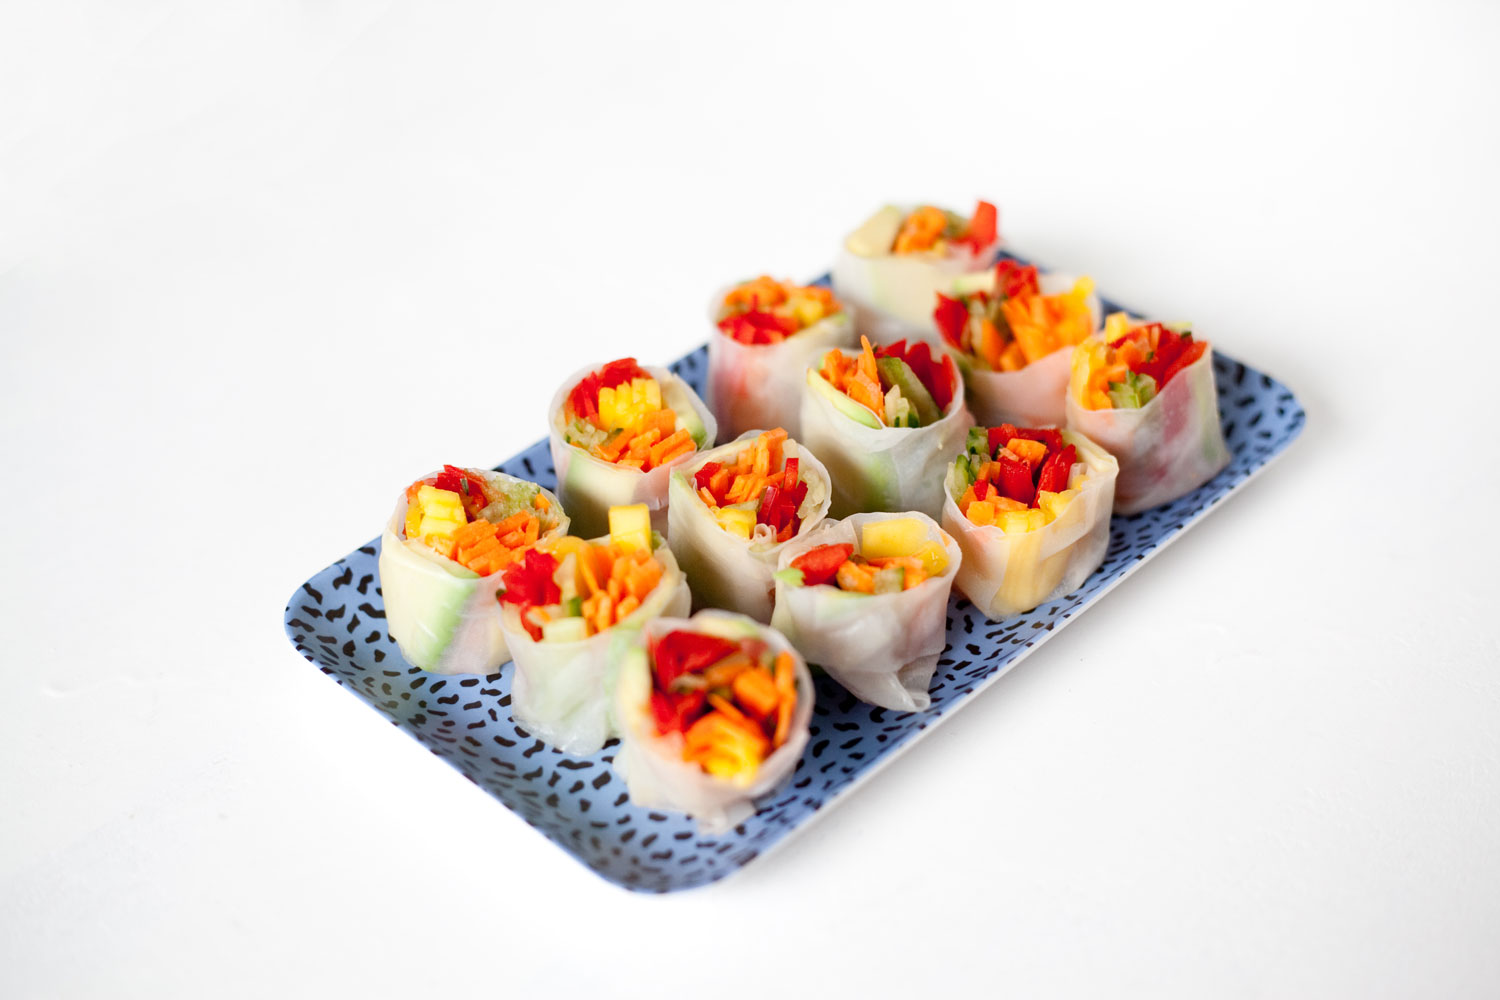
Ingredients for a colorful fresh spring roll.

Rice paper wraps filled with raw vegetables.

Rice paper wraps filled with raw vegetables.

RainbowSummerRolls3.jpg

I love Vietnamese fresh spring rolls, also known as summer rolls.  Rice paper wraps offer another gluten free wrap option.  Be sure to double check the ingredient list as not every rice paper wrap is gluten free if you are looking for this option.

Just like nori for making sushi maki, rice paper wrap can be used to roll up anything you can think of.  My kids like to make their own and they can get very creative with it;  imagine a fresh fruit coulis drizzled over it—blueberry to be precise.  I am kindly reminded by them that I a missing a spectrum of blues, indigos, and violets for it to called a rainbow.

Here's a blend of my veggie fruit wrap.  It's a light starter and a pretty bite size treat for everyone.

Rainbow Rolls

INGREDIENTS

• 1 carrot
• 1 red pepper
• 1 mango
• 1 cucumber
• 1 avocado
• A handful of mint leaves
• Rice paper , 22 cm

PREPARATION

Cut and slice your vegetables into thin strips.   Place them into separate bowls.

INSTRUCTIONS

Prepare a pan filled with a half inch of warm water.    Take a piece of rice paper and place it in the pan of water, flipping it quickly so that both sides are wet and then place it on a flat work space (I use a silicone or wooden chopping board).  Use your fingers to rub in the water and to flatten out the rice paper.

Place your sliced vegetables about a a third up of the rice paper and leaving an inch and a half on the sides.  Then line up two or three pieces of mint leaves next to it and another line of avocado so that you will have 3 rows neatly lined up next to each other. 

Start from the bottom and roll up into your first line of vegetables, tuck in the sides of the rice paper and continue to roll up.

Using a sharp knife cut the rolls in half and then in thirds.  Line them up on a tray and serve immediately.  You can also plastic wrap it and place it in the fridge to serve later.

NOTE

You don't want your rice paper to be too wet otherwise it will tear. Give it a give dip on both sides and quickly take it out as it will continue to absorb the water once it is placed on your flat work space.

Practice makes perfect.  Keep your rolls tight when rolling and make sure not to overstuff your rolls. 


Eggplant Rolls

Eggplant Rolls on a bed of arugula.

Eggplant Rolls on a bed of arugula.

Spring break has begun in Paris.  For those sticking around in Paris we are blessed to see and feel the sun for many days in a row now.   Sidewalk cafés are once again full of life but they usually are even with the tiniest bit of sunshine out.

My family has gone off to the south of France and I find myself twiddling my thumbs after days off on my own—four days to be exact!  I watched the entire season of Big Little White Lies (I stayed up til 3 a.m.).  So as you see, I do have my OCD moments but usually in the kitchen and not in front of the telly.   I also managed to squeeze in two films, some light reading, evenings out with friends, and two very long, peaceful runs along the canal, topped off with a light yoga routine.

I was conjuring up what I could do next, thus the twiddling of the thumbs.  That's energy zapping you know, so off to the fridge I went.  I panicked when I saw two large eggplants in sight —for what's a girl to do with two nights left on her own with two large eggplants?   The fridge had to be emptied since I would be off to the south of France for the long weekend to join my family and the thought of waste just boils me right up.  

The original intent was to make fried eggplants for the whole family.  Fried eggplants minus the family equals fried eggplants for one!  Ooh, now that just screams out heart attack to me.   I decided otherwise.   Let's just say I got the eggplant rolling—literally!


Eggplant Rolls

INGREDIENTS//Yields 14-16 rolls

• 2 eggplants, peeled and sliced (1/4 inch)
• 250 grams ricotta cheese
• 50 grams parmesan cheese, grated
• 1 egg, whole
• Fresh basil, finely chopped
• salt and pepper, adjust accordingly
• 1 cup (225 grams) tomato sauce
• salt and pepper, adjust accordingly

INSTRUCTIONS

Rinse the eggplant, cut off the ends, and peel the skin off length-wise in alternating stripes with skin and no skin.

Use a mandoline or a sharp knife to cut the eggplant in 1/4 inch slices.

Brush the slices with olive oil and place them on a baking sheet. 

Place it in a pre-heated oven at 200° celsius ( approx. 390°F°) for 8-9 minutes or until golden.  Take it out and let it cool.

Prepare your filling by combining the ricotta, parmesan, and egg.  Mix well.

Stir in the fresh basil and add some salt and pepper.

Set it aside.

Take out your baking dish and spread a thin layer of tomato sauce on the bottom of the dish.

You can start your rolling process by taking a spoonful of filling and placing it at the wider end of the eggplant.

Roll up the eggplant as tight as possible and place it in the baking dish.   Line them up alongside of each other as you continue to roll the rest of the eggplant slices.

Top off with some tomato sauce and mozzarella cheese.

Place it in a pre-heated oven to 175° celsius (approx. 350° F) and let it bake for 30 minutes or until the cheese melts and has a golden color.


Vegetarian Homemade Dashi

Steeped Kombu

Steeped Kombu

Dashi is the base of many Japanese dishes.  Found in many noodle soup bases and dips; one of my favorite Japanese noodle dish is zaru soba, the cold buckwheat noodles dipped into tsuyu sauce—such a hot-weather treat.  I've learned to make my own dashi over the years recalling how my mum did it when I was a kid.  Mostly, I remember eating the kombu (dried kelp) after it was pulled out of the stock and laid aside.  Maybe it was intended for the trash bin but it always ended up in my stomach.  I've always loved the taste of the sea and maybe that's where it began...in the kitchen.

Kombu Dashi Stock

Kombu Dashi Stock

This is a great vegetarian stock.  It is a light broth that is rich in glutamates, thus producing more umami (pleasant savory taste) flavors.  If you buy the packaged dashi which sells in powdered or granule form, and also packaged like tea sachets, they usually contain MSG.   So if you are allergic to MSG or just wince at the acronyms, you can whip it up at home naturally in large stock and freeze it for future use.   Just so you know MSG is synthesized to replicate the naturally occurring glutamates in kombu, so it's a synthesized flavor enhancer. 

 Kombu, dried bonito flakes, dried shiitake mushrooms, and small dried fish are other elements to making dashi.  The kombu used alone is the most basic dashi and a great vegetarian option.  Stay tuned for the next post on how to make katsuobushi dashi which is a fish-based dashi.

Homemade Dashi
 

INGREDIENTS//Yields approx. 1 liter

•  1 piece kombu (about 12 inches long)
•  1/2 liter water

PREPARATION

In a medium size glass mixing bowl, steep your kombu in the water and put it in the fridge overnight.  You can cut it down to fit your bowl.

INSTRUCTIONS

Take your bowl of steeped kombu and transfer it into a medium size pot along with the water.

On medium heat, simmer the kombu until boiling point.

Quickly fish out the kombu (set it aside for a second stock) and turn down the heat.

Turn off the heat and let it cool down.

Refigerate the stock in a tightly sealed container for use up to four days to a week. 

NOTE

The kombu can be used again (right away) after the first stock to make a second stock referred to as niban dashi.  The first stock is called ichiban dashi.


Roasted Baby Artichoke With Parmesan

Roasted Baby Artichoke With Parmesan

INGREDIENTS//Serves 2

• 6 fresh baby artichokes
• 1 lemon
• 1 tsp crushed garlic
• 2 tbsp olive oil
• 30g grated parmesan

INSTRUCTIONS

Prepare a bowl of water and lemon juice on the side enough to hold the baby artichokes. 

Cut off the spiky top bit of the baby artichoke and part of the stem.  Make sure to remove bottom and outer leaves and to leave a bit at the base.  The best thing about the baby artichoke is that you can eat everything inside—yes, even the choke as opposed to the ones in large artichokes. 

Cut each artichoke in half lengthwise and toss in the water lemon juice mixture.  This keeps the color of the artichoke from turning brown quickly. 

Drain the baby artichokes and put them in a steamer for about 15 minutes.  This gets them soft and tender.   Stab a fork in to do a quick check.

Take them out and place the steamed baby artichokes in a bowl, adding the olive oil, crushed garlic, some salt, pepper and lemon juice. 

Toss it all together and then place them on a baking sheet cut side up . 

Sprinkle some parmesan cheese on the baby artichokes and pop them in the oven at 210°C for about 10-15 minutes or until golden brown.  Thisgives them that slight crispness.

Kohlrabi Nori Omelette

Kohlrabi.jpg

It's been so rainy, dreary, and cold in Paris.  Thankfully these vibrant veggies vitalize my mind and body.  Can you spot the kohlrabi?  It's the round, stout bulb with the longs stems protruding out of it.

I tasted kohlrabi only a few years ago at a German friend's home.  We got home from a very hot and exhausting day at the park with the kids full of dirt, hunger and thirst.  She quickly dropped all her things, washed her hands and grabbed an odd-looking vegetable from her countertop that I had seen in markets before but never knew what to do with them, nor did I know what it was called.  She simply used a sharp knife to cut away it's thick skin and then sliced a piece, sprinkled some salt on it and handed it over to me to eat.  Wow, it was juicy and crisp!

KohlrabiFritter.jpg

Kohlrabi can be eaten raw or cooked.  This was supposed to be a fritter dish that flopped "in the making of".  It turned out to be more of an omelette instead.  It's a mistake but a good one to be discovered!

Kolhrabi Nori Omelette

INGREDIENTS

• 1 small kohlrabi, matchstick slices
• 1/2 cup shredded nori
• 1 egg
• 2 tablespoon panko
• pinch of salt
• pinch of white pepper

INSTRUCTIONS

In a medium size mixing bowl, add your kohlrabi, egg, panko bread crumbs and the nori. 

Sprinkle a touch of salt and white pepper and whisk to combine all ingredients.

Pour mixture into a skillet and cook until the egg turns golden brown. 

Slide it onto a plate and serve. 

NOTE

I cut mine up into squares so that they were little bite size pieces.  They are great as kids snacks and appetizers.

Watercress Salad and Cilantro Dressing

A colorful diet is a healthful diet.  Orignally I was looking for jicama to add to this salad.  It was supposed to be a jicama watercress salad with mango slices except that I couldn't find it nearby.  My brain still thinks we are in San Diego but being back in Paris, this meant I'd have to find a specialty Mexican store (not near me).  Popular in Mexican cuisine, jicama has also spread to find itself cultivated in Asia.  Ding!  So off I went to my local Asian stores in search of jicama.  Well, I didn't quite find the jicama, nor was there a ripe mango ready for me, but I did wind up with a bunch of fresh nèfles (very similar to the loquats of Asia).  

Upon arriving at home I was greeted by Lady Jo and was handed a basket of organic veggies.  She was on duty call at her local organic co-op and got dibs on the veggies left behind.  Now, just so you know, I fully support the "No Veggies Left Behind" act and accepted the vegetables gracefully.  I eyed the big beetrootfor that would feed me for at least a weekand whipped out my mandoline to get working on it.  So this is how a dish begins to transforms itself, jicama replaced by beet root and mangos by nèfles.  Ooh, what else can I use on my mandoline since I have it out ahhh...yes, carrots... then a little bit of this, and a little bit of that...

Watercress Salad and Cilantro Dressing

INGREDIENTS//Serves 4-6

• 1 bunch watercress
• 2 carrots, julienned
• 1 medium beetroot, julienned
• 1 cup loquats (neflè), cut into bite-size pieces; mango is also a good substitution.
• Handful of sunflower seeds and linseeds (flaxseeds)

Dressing

• 1 bunch coriander (cilantro)
• 1 shallot
• 1/2 lime, juiced
• 1/2 inch of ginger, fresh and grated
• 1 clove garlic
• 1 Thai chili, cut a piece according to your spice level
• 1 1/2 tablespoon tamari sauce (or soy sauce)
• 1/2 teaspoon honey (optional)
• 2 tablespoons sesame oil
• 1 tablespoon vegetable or canonla oil

INSTRUCTIONS

Rinse the watercress and put it in your salad spinner.

Prepare a medium size bowl.  Separate and discard the stalks from the leaves, keeping just the thin, top bit of the stalks attached to the leaves.

With your mandoline, prepared your carrots and beetroot and set them aside.

Cut your fruit into bite size pieces.

Prepare your dressing by combing all the ingredients into a food processor.

Process until smooth.

In a salad bowl, add your watercress and pour in the dressing.

Toss together so that the watercress is drenched in the dressing, and then add in the rest of the ingredients.

Sprinkle some sunflower seeds and linseeds (flaxseeds) over your salad before serving.


Ratatouille Quesadilla

Ratatouille-quesadilla2.jpg

I just got back from San Diego, where I was paying a visit to meet my newborn niece, Sabine.  Unbiased of course, she is gorgeous.  Her nickname is "Bean" because that's what came out of her older sister's mouth when she was all of one year old trying to pronounce "Sabine".   Ever since she started out as a 'lil bean in her mama's belly, she's been referred to as "Bean".

Bean has that baby smell that I quickly got addicted to.  Every early morning, 6 a.m. to be precise, I would wake up and head to the kitchen: to find her, hold her, press my nose against her head and then inhale her baby scent.  If you are wondering why the kitchen, it's because my brother-in-law has started his day and mine (bless his heart) with a whole other scent, the coffee dropJapanese style drip.  He has his tools in order: grinder, scale, and drip filter,

This is how my mornings played out until I got over my jet lag: rise and shine at 6 a.m. soon became rise and snooze til 9 a.m.  Although I still had Bean's baby scent to look forward to, gone was the aroma of the other bean the coffee beanMy brother-in-law was long gone and off to work.

Besides sniffing Bean's head and drinking coffee from the drip, I did eat a lot of Mexican food.  Afterall, San Diego is just next door.  I thought I knew it all from my days milling about at Mexican family soccer games in some Brooklyn park, where I could eat freshly made tortillas and salsa off their portable, makeshift grills right out of the backs and trunks of their cars, and buy Tecate beers straight from their coolers, all for two dollars.  Apparently not.
 

Ratatouille-quesadilla.jpg

I discovered an ingredient called hominy that I'll have to search for in Paris.  Once I find it, I'm keen on making a fish based or vegetarian based pozole which I'll share with you in the future.  As for now, I have French Provençale ratatouille leftovers that I've converted into a Mexican quesadilla dish.  Olé!

Ratatouille Quesadilla

INGREDIENTS//Serves 4

•  1 x 400 gram tin of red kidney beans or other bean of preference
• 1 shallot, chopped
• 1 tablespoon cumin
• 1 teaspoon chili powder
• 150 grams of emmental cheese
• 2 cups ratatouille or any vegetable filling
• 1/2 bunch fresh coriander (cilantro)
• 2 large flour tortillas
• Dallop of sour cream or crème fraîche

INSTRUCTIONS

Add some cooking oil in a pan and cook the shallots over medium heat until they have softened. 

Add the tin of beans and stir.

Throw in your spices: cumin, chili powder.   Stir it up a bit.

Then transfer it to a small mixing bowl and mash it up with a fork or a masher.

Since I had ratatouille left over, you can choose any combination of vegetables; just cook it beforehand.   My kids love this with spinach, so I simply steam the spinach.

Lay out your tortilla and spread half of it with the bean mash, and the other half with your vegetable filling of choice.  Be careful not to add too much filling otherwise it will fall out.  Try to keep it thinly spread.  Sprinkle some coriander over the cheese.

Grab two to three handfuls of cheese and spread over the beans.

Place it on a large cooking pan over medium heat and cook until the bottom of the tortilla warms up and starts to speckle up golden brown.

Using a spatula, fold the quesadilla in half.  Press down on the quesadilla with the back side of the spatula and cook until the whole side is golden brown and then flip and repeat.

Transfer to a cutting board and cut them into wedges.

Serve along witha dallop of sour cream or crème fraîche (depending on which country you live in) and garnish with coriandre.


Chickpea Sweet Corn Veggie Power Patty

When it comes to serving a veggie patty chez moi, I have to dress it up for my husband.  He's been raised a true carnivore and he's ambivalent towards words like "veggie patty".  It's not that he doesn't like his veggies, he does; he just doesn't need them to be meat replacements.  So no interpretations needed for a burger at ours.  I just serve him the whole veggie plate experience.  There's sustenance to these power patties and they go great on a salad and keep you nourished for hours.  

Veggie patties are wonderful since you can mix any veggies you want in it along with any spices, beans, grains, or tofu, and usually some breadcrumbs and nuts.  I played around and grounded whole oats to use as my binder.  This replaced the breadcrumbs.  This recipe is just one of many that you can conjure up in your own magic mixing bowl. 

Chickpea Sweet Corn Carrot Veggie Patty

BAKE TIME

Total bake time is 20 minutes at 200° C (390° F). 
10 minutes per side.

INGREDIENTS//yields 12 medium size patties or 16 small patties

• 3 cups chickpeas (2 x 400 gram tinned chickpeas)
• 2 teaspoon cumin
• 2 teaspoon paprika
• 3 clove garlic, minced
• 1/2 teaspoon chili powder
• 2 cups sweet corn (15 oz tin or 425 ml tin)
• 1 carrot, grated (optional)
• 50 grams of almonds, finely chopped
• 1/2 bunch of fresh flat parsley, finely chopped
• 1 shallot, chopped
• 100 grams of roasted kasha (buckwheat) groats, blended into crumbs
• 50 grams whole oats, blended into flour
• 200 grams feta cheese (optional)
• Salt (adjust according to taste)

PREPARATION

Blend your whole oats and almonds separately and put it in aside.
In a food processor, finely chop your parsley and shallot.  Lay it aside in small bowl.

INSTRUCTIONS

In a small size pan, heat up some cooking oil, and cook the grated carrots until softened.  Then set it aside to cool.

In a large mixing bowl add the chickpeas and mash by hand using a masher making sure no whole pieces are left.  Mash until soft but with some coarse texture left in it.

Mix in your spices: cumin, paprika, chili powder, garlic.

Add the sweet corn and the cooled cooked carrots.  Combine together.

Add the blended oats.

Crumble the feta cheese and add it into the mix (optional).

Stir in the almonds, shallots, and the parsley.

Add salt according to taste.

Scoop the mixture with wet hands to form your patties.

Using a basting brush, slightly brush the sides of the patty with olive oil.

Pre-heat your oven and line your baking tray with parchment paper.

Coat your patty lightly in the blended roasted kasha and place on the baking tray.

Put it in the oven and bake at 200°C for 20 minutes.


NOTE

I did have some dried herb called ache de montagne on hand so I crumpled some up for seasoning.  It happened to be one of those seasonal herbs added into an organic basket from the local farmers.  I did some research and it's called lovage in English.  It has an unsubtle taste, much like celery. 


Tzaziki


INGREDIENTS

• 1/2 English cucumber (long green ones), deseeded and grated (preferably organic so you can keep the skin on)
• 150 grams of Greek yogurt
• 1/4 clove garlic, crushed and minced
• 1 tablespoon olive oil
• 1/2 tablesoon lemon juice
•  1 tablespoon chives, diced
•  Salt (according to taste)

INSTRUCTIONS

If you are using an organic cucumber there is no need to peel it.  However, with a conventional cucumber I usually peel the skin off.  Halve the cucumber lengthwise.  Take a teaspoon and scrape out the seeds. 

Grate the cucumber using the large hole of a box grater.

Salt the deseeded and grated cucumber and let sit for 15 minutes so that the water comes out of it. 

Mix the garlic, olive oil and lemon juice into the yogurt.  Stir well. 

Squeeze the excess water out of the cucumbers using your hand or a cheesecloth and then add the cucumbers into the yogurt mix.

Add the chives and salt to taste.
 

Tarte aux Épinards

This is one of my first, self-impressed French dishes I have ever made.  I learned it from ma belle-mère—yep, my mother-in-law— that's how we address our mother-in-laws in France.  It can be so ironic for many, but I got lucky; I truly do have a belle-mère. 

The kids call her "Mamie Jacotte", an affectionate term rather than the literal translation, "grand-mère";  Jacotte is shortened from Jacqueline.  She's not only a fantastic belle-mère and grand-mère, but a wonderful cook.  I have picked up many of her tips and recipes in cooking and this is just one of many. 

Ma belle-mère makes simple and intricate dishes.  I usually opt for the former recipes.

Tarte aux Épinards

• 1 puff pastry
• 500 grams spinach, frozen or 700 grams of spinach, fresh
• 1 clove garlic, minced and sauté
• 4 eggs
• 4 heaping tablespoons crème fraîche
• 100 grams of emmental cheese
• a pinch of nutmeg
• Salt and pepper according to taste

INSTRUCTIONS//serves 4-6

Take your tart or quiche pan (around 10 inches in diameter, 1-1/2 to 2 inches deep or 25 cm in diameter, 4 cm deep) and roll out the puff pastry and place it into the pan.  Press the pastry into the sides of the pan. 

Use a fork to poke some holes into the bottom of the puff pastry to release any trapped air and to keep it from puffing up when baking. 

Once your oven is pre-heated at 190° C (375°F), place it in the oven to bake for around 10 minutes or until the puff pastry changes color to a golden brown.   This step is called blind baking; It partially cooks the pastry dough to prevent a soggy crust.  Check often during the duration of this time so that if you catch your pastry puffing up, just slide it out of the oven, take a fork to poke more holes and press the pastry back down into place, and place back into the oven.  Some people use ceramic beans or dried beans to keep the pastry from puffing up. 

Take it out of the oven and place the spinach filling inside.

Spinach Filling:

If you are using frozen spinach, cook it down on low heat until it thaws.  Drain out the excess liquid.  If you are using fresh spinach, begin with the the next step.

Sauté your garlic in a pan with a half tablespoon olive oil over medium heat. 

Then add your spinach and toss it around with the garlic.  Sauté for a couple of minutes and add some salt.  With fresh spinach, sauté and then cover the pan with a lid to let cook for 5-10 minutes or until wilted.  It should be a nice, saturated green.  With a pair of tongs, take out the cooked spinach and place it in a bowl and leave it aside to cool down.  Push down with the pair of tongs or a fork to get rid of excess liquid.

In a medium size mixing bowl, beat in 4 whole eggs.

Add your heaping dallops of crème fraîche and mix.

Stir in the emmental cheese.

Then a pinch of nutmeg, some salt and pepper according to taste.

Mix the spinach in with the egg, crème fraîche, cheese batter.  Stir until the spinach is evenly mixed in.

Pour this mixture into your blind baked puff pastry and place it in the oven for 40-45 minutes at 190° C (375° F).
 

NOTE

I have used both fresh and frozen spinach for this recipe.  It just depends on what I have in my fridge.  In France, I buy the frozen spinanch with their stems (épinards en branche).  If I use fresh spinach I trim the thicker part of the stems and keep an inch or two below the leaf.  You can also use 125 grams of yogurt to replace the crème fraîche.